March 2020
Configure Layer 7 API Gateway and ActiveMQ 5 to use Openwire instead of AMQP
27/03/20 12:45
While evaluating various messaging products, I've come across ActiveMQ quite a bit, and I've found it to be more than adequate for application and enterprise messaging. In the course of my work, I have also had to integrate the Layer 7 API Gateway with ActiveMQ, and found an interesting quirk…
The documentation does explain how to configure the API Gateway to reference JMS destinations in ActiveMQ, but only using the AMQP protocol. While doing some performance testing, I decided to investigate what would be involved in configuring the API Gateway to use ActiveMQ using the Openwire protocol and to compare that with the AMQP protocol.
Caveat: These instructions are specific to the Layer 7 API Gateway 9.4 and ActiveMQ 5.15.11. Your mileage may vary!
Step 1: Stop the API Gateway
First, shut down the API Gateway services. On the appliance version, you can do this by running:
service ssg stop
Step 2: Copy the client JAR files from ActiveMQ to the API Gateway
You'll need the following files from the lib directory in your Apache ActiveMQ installation.
- activemq-client-5.15.11.jar
- geronimo-j2ee-management_1.1_spec-1.0.1.jar
- geronimo-jms_1.1_spec-1.1.1.jar
- hawtbuf-1.11.jar
- jcl-over-sl4j-1.7.25.jar
- slf4j-api-1.7.25.jar
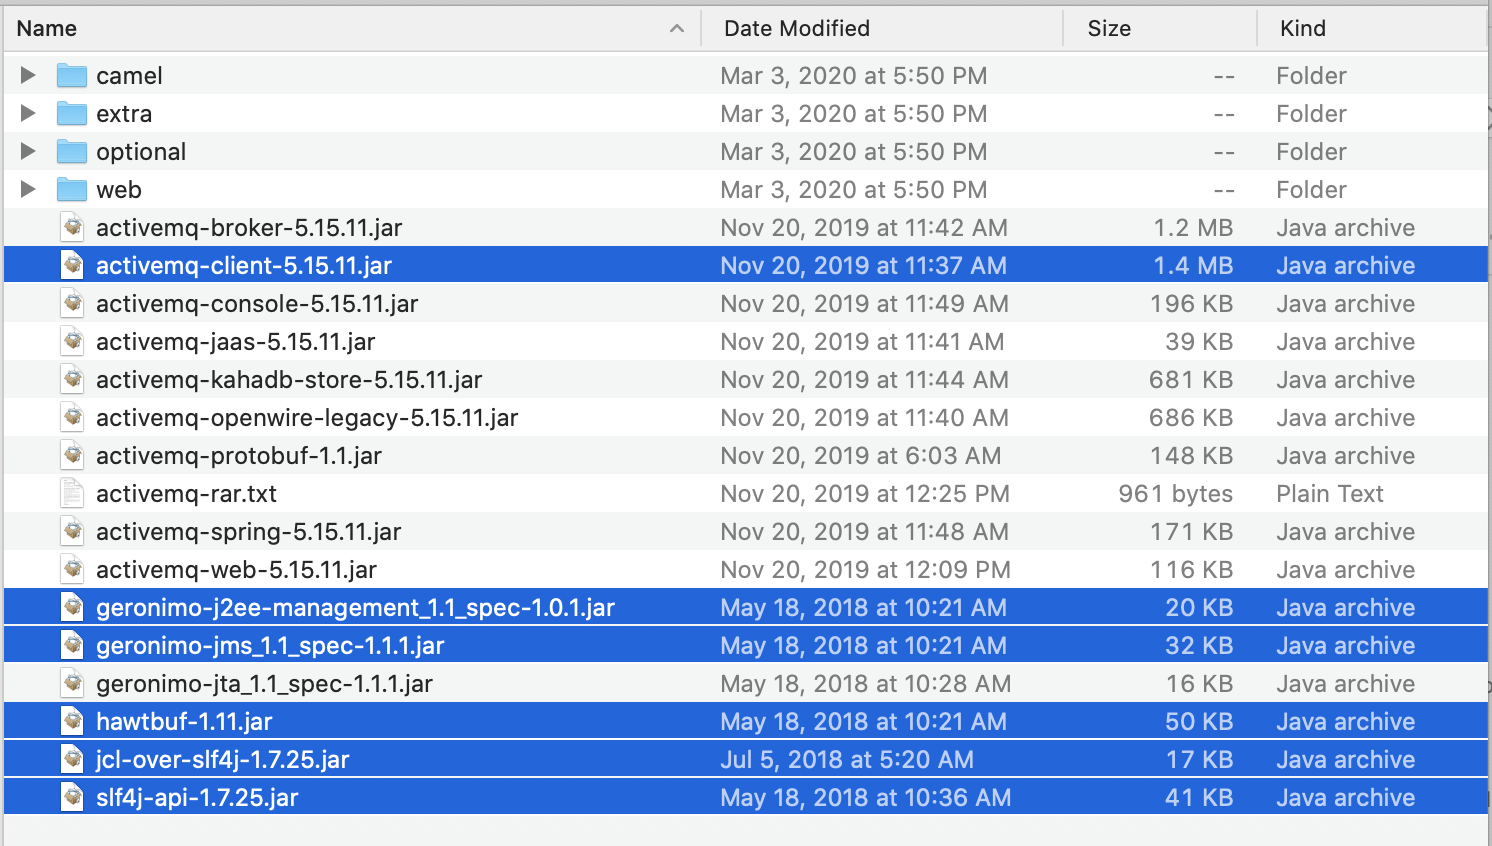
The API Gateway can load user-defined JAR files from the /opt/SecureSpan/Gateway/runtime/lib/ext directory.
This location is where you may place the JARs for custom assertions that extend the API Gateway's functionality, and files in this directory should be owned by the layer7 user and set to read-only. You'll notice that are some extraneous files in this listing because I have already copies the files over for using the AMQP protoocol with ActiveMQ.

Step 3: Start the API Gateway
You can now start the API Gateway. Again, on the appliance you can run the command:
service ssg stop
Step 4: Create a Web API policy
Start the API Gateway Policy Manager and use the Publish Web API wizard to create an API with the following settings:
Service Name: JMS Receive Message
Target URL:
Gateway URL:
And click Finish.
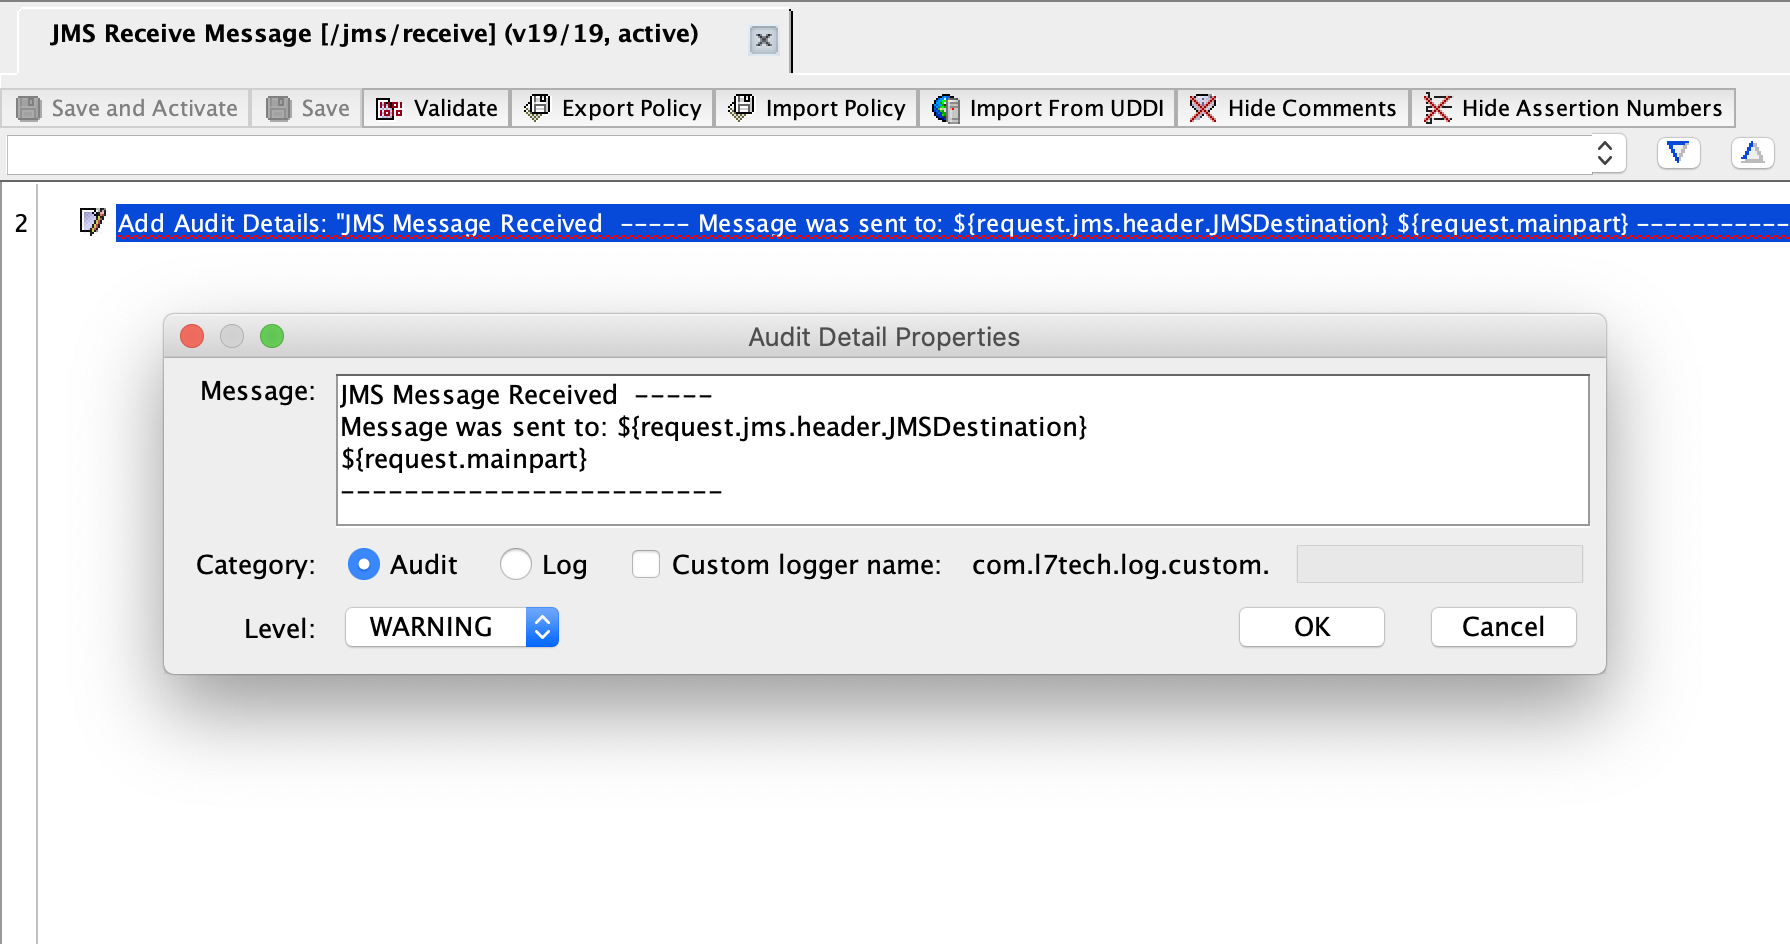
In the editor window, add an Add Audit Details assertion to the policy with the following settings:
Step 5: Configure the JMS Destination(s) in Policy Manager
Using the API Gateway Policy Manager and from the menubar, select Tasks —> Transports —> Manage JMS Destinations to open the Manage JMS Destinations dialog.
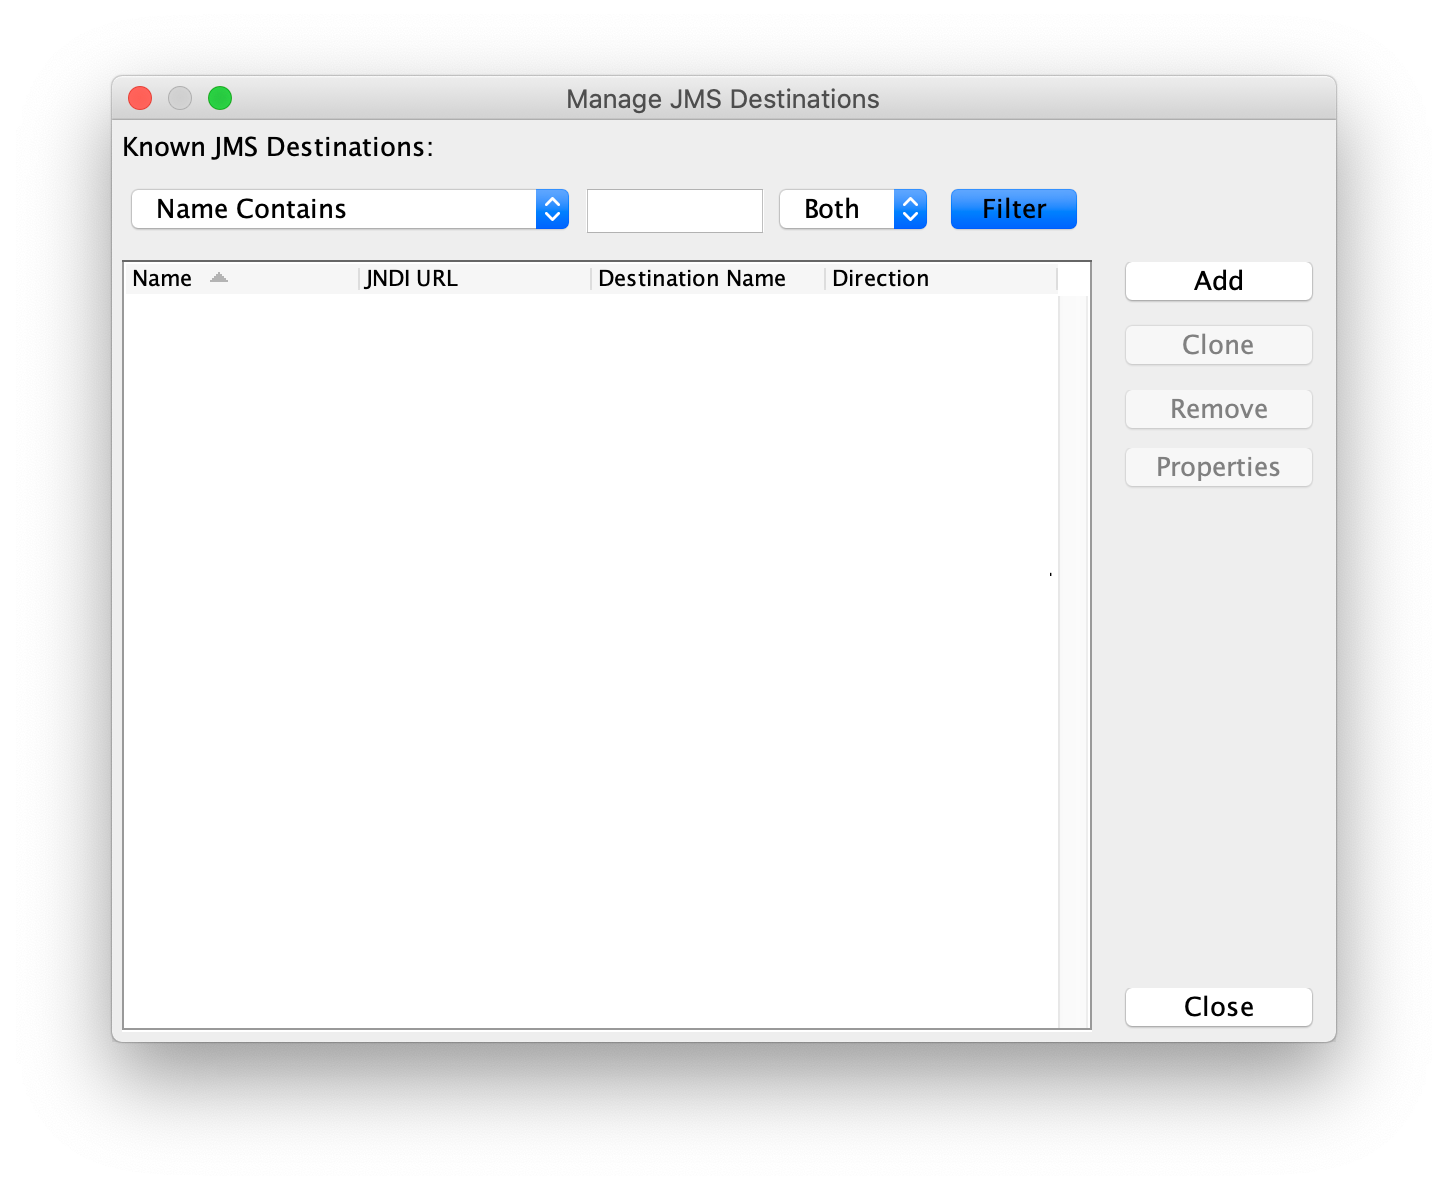
Click Add, and now you can create an Inbound JMS Destination for subscribing to messages from ActiveMQ. Enter a Name (I called this one ActiveMQ Inbound), and select Inbound for the Direction.

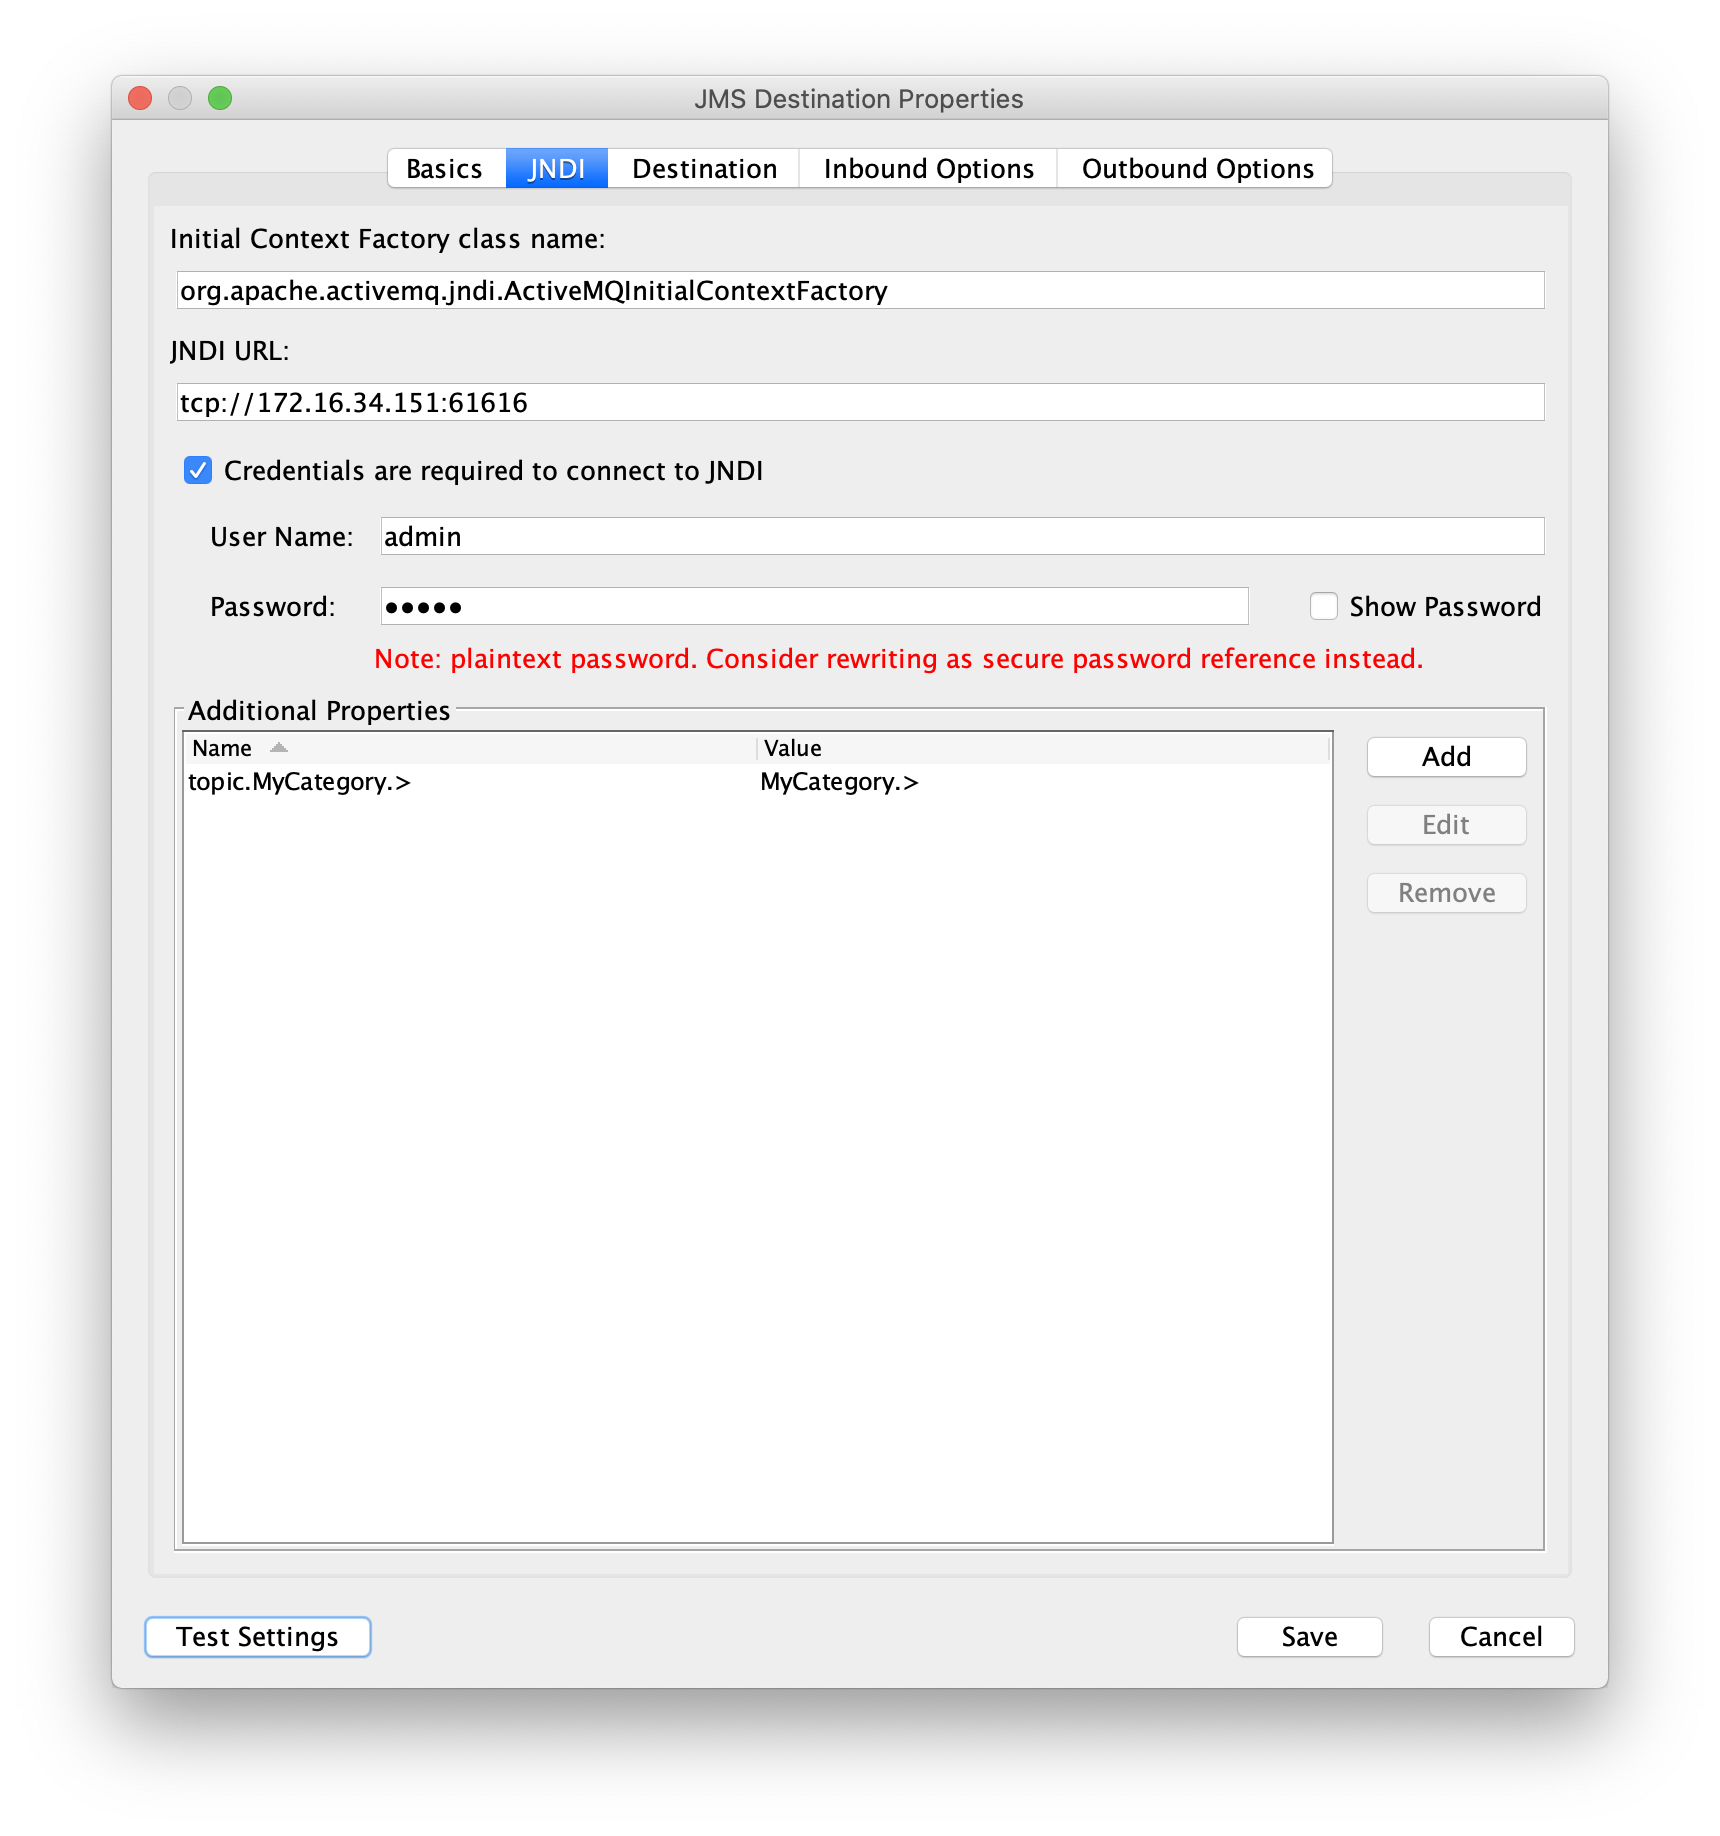
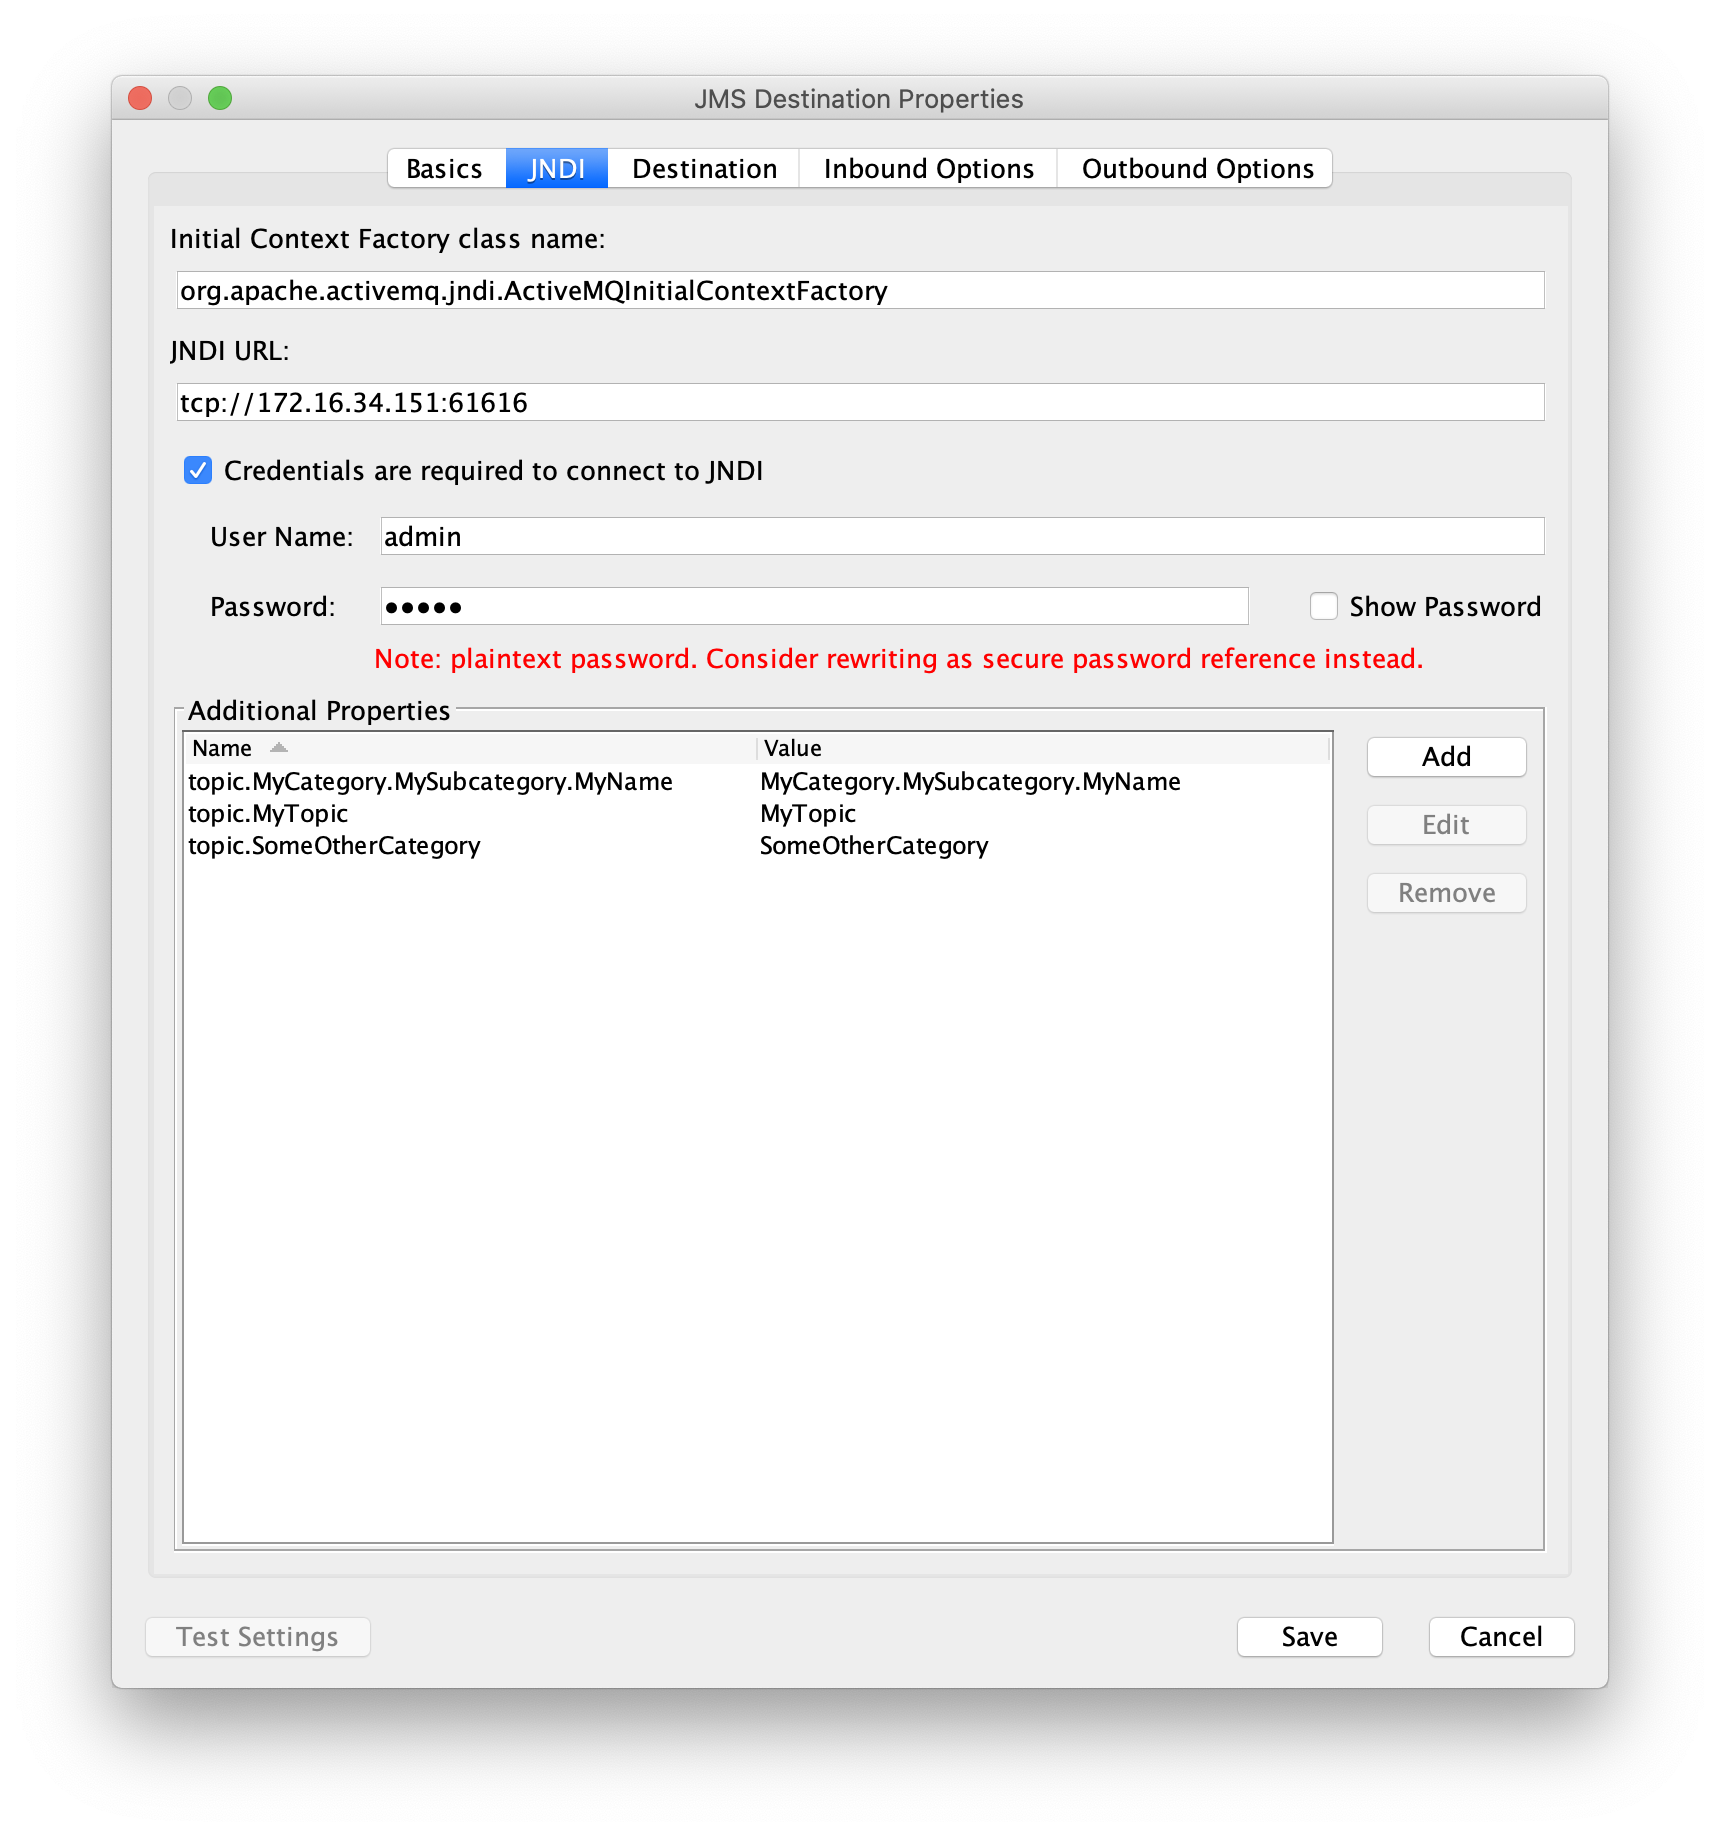
Under the JNDI tab, you will need to set the following values:
Initial Context Factory class name: org.apache.activemq.jndi.ActiveMQInitialContextFactory
JNDI URL: tcp://your-activemq-hostname:61616
Credentials are required to connect to JNDI: Checked
User Name: admin (default credentials with ActiveMQ)
Password: admin (default credentials with ActiveMQ)
Now Add Additional Properties:
Name: topic.MyCategory.>.
Value: MyCategory.>
The Additional Properties configuration is critical because the API Gateway is creating the JNDI properties "object" for the ActiveMQ client that will contains all of the settings for the ActiveMQ queues, topics, and even connection factory names you may reference. For an Inbound JMS Destination, you will typically only need to specify a destination following the conventions in the ActiveMQ 5 JNDI documentation for naming your queues, topics, and connection factory names.
One nice feature is that the API Gateway does respect the use of JMS wildcards for the destination name, allowing you to subscribe to multiple destinations seamlessly. In this example, my gateway will be receiving messages to any ActiveMQ topic whose JNDI name has the string "MyCategory" as its first component . This means it would receive messages to topics named MyCategory.events.birthdays or MyCategory.ABC.DEF.GHI.JK or just MyCategory.
On the Destination tab enter the following settings:
Destination Type: Topic
Connection Factory Name: ConnectionFactory (you can specify a different value if you set the connectionFactoryNames property on the JNDI tab so that it includes the name of your connection factory)
Destination Name: MyCategory.>
Credentials are required to connect to JNDI: Checked
User Name: admin (default credentials with ActiveMQ)
Password: admin (default credentials with ActiveMQ)
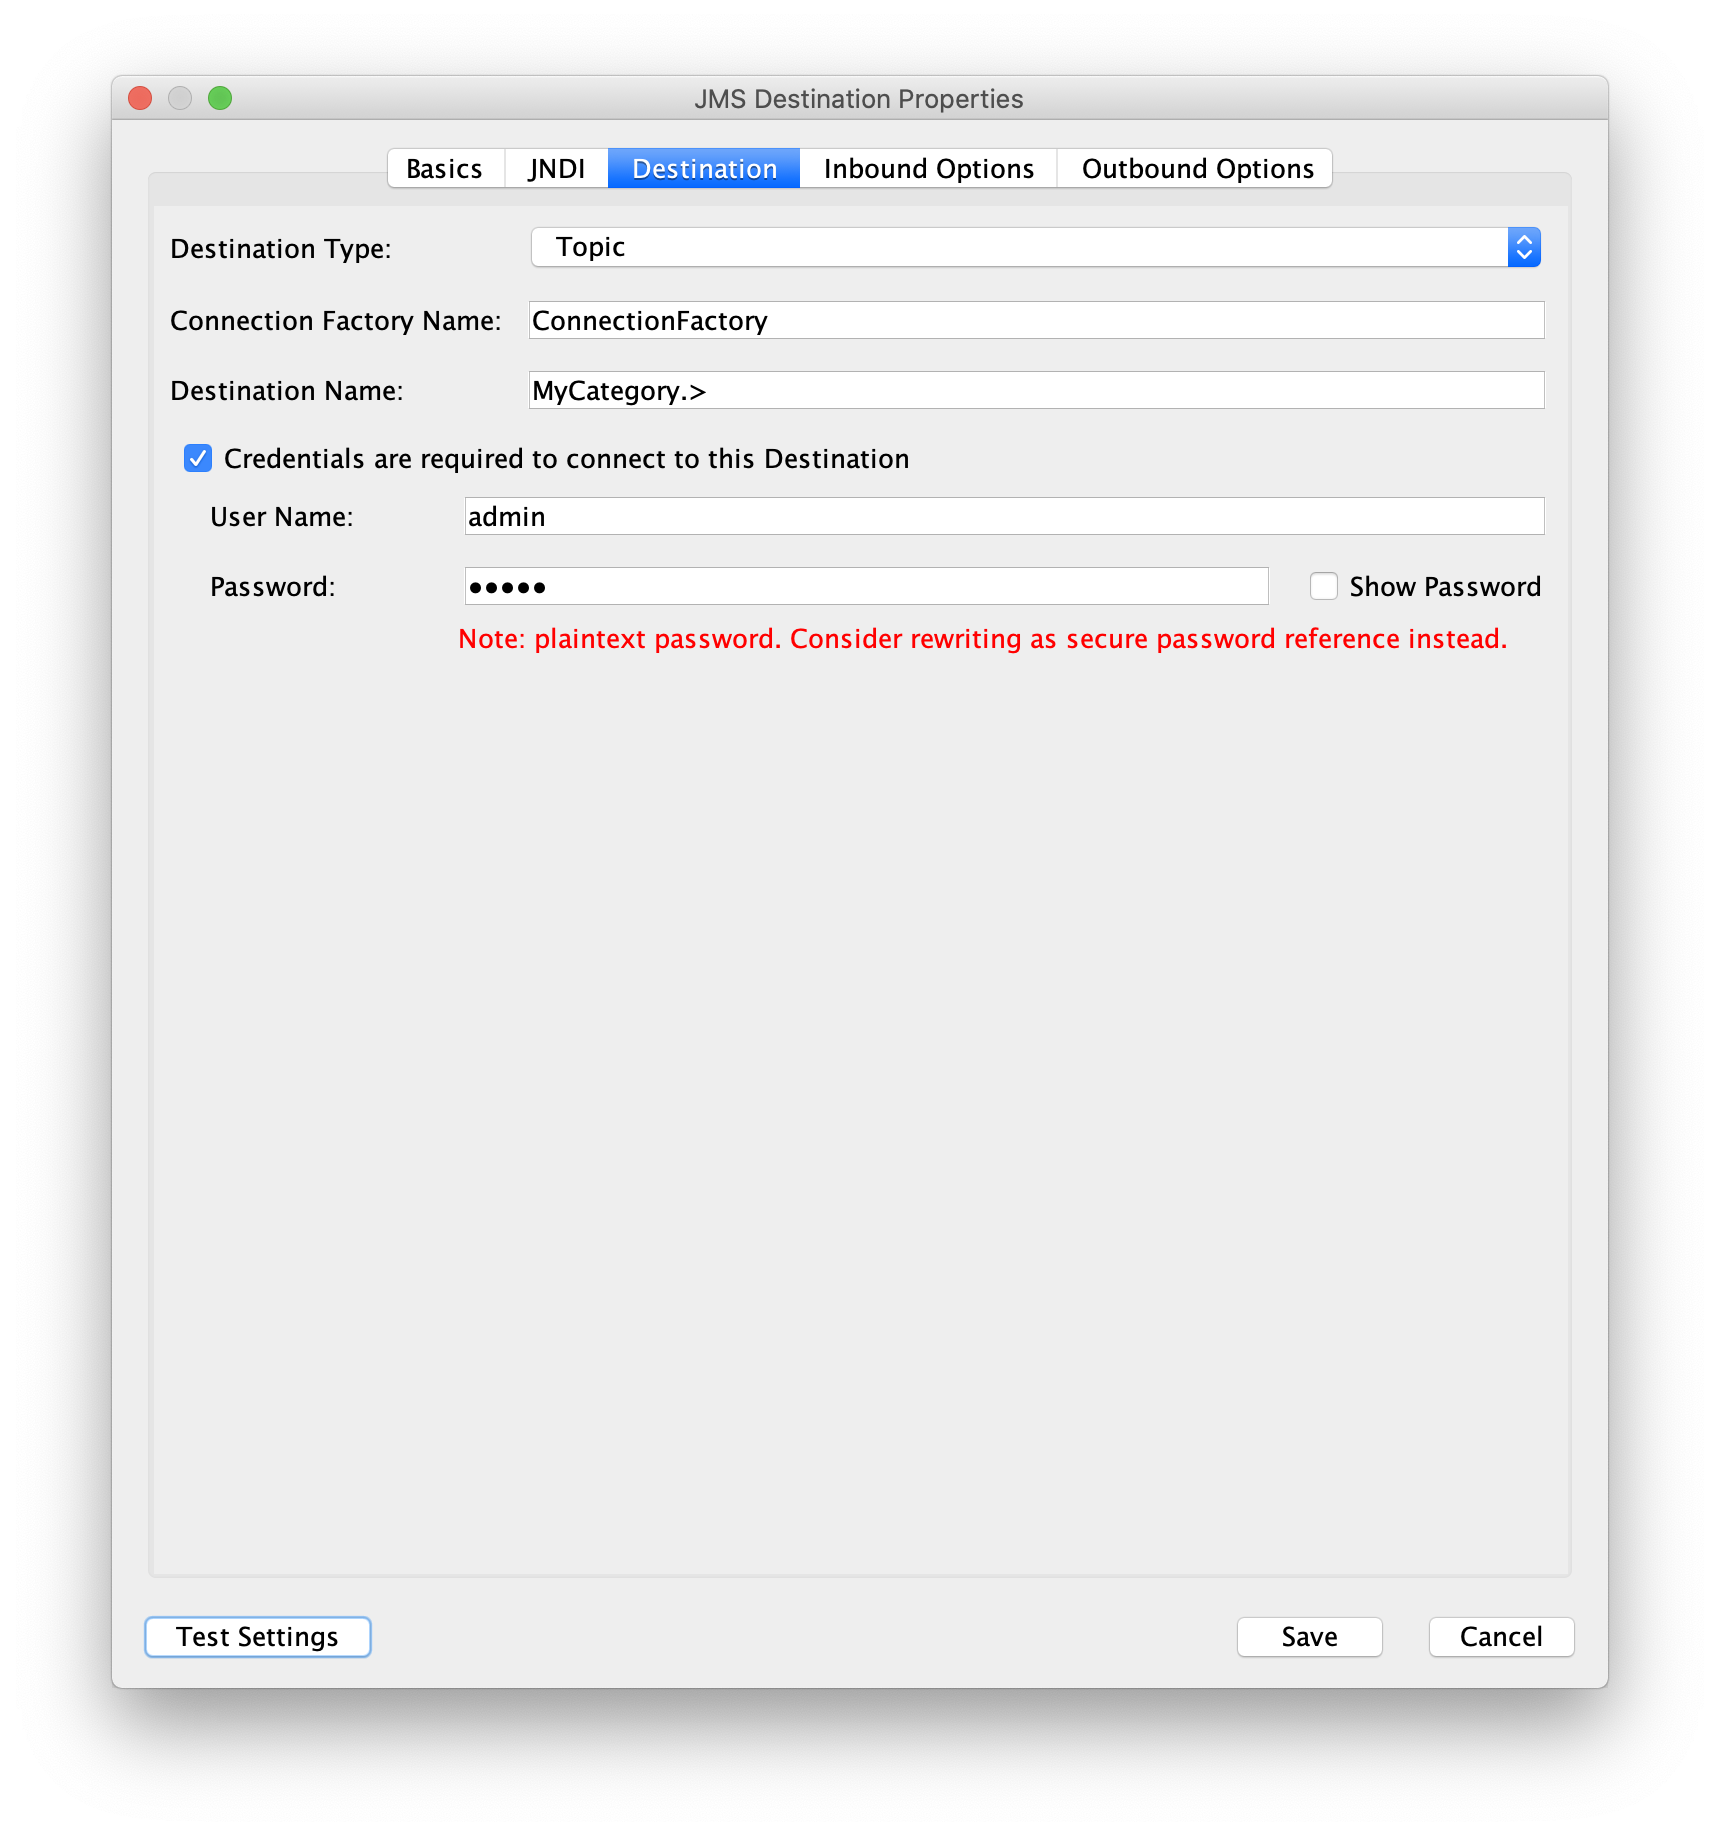
You can now click on the Test Settings button and you should see…

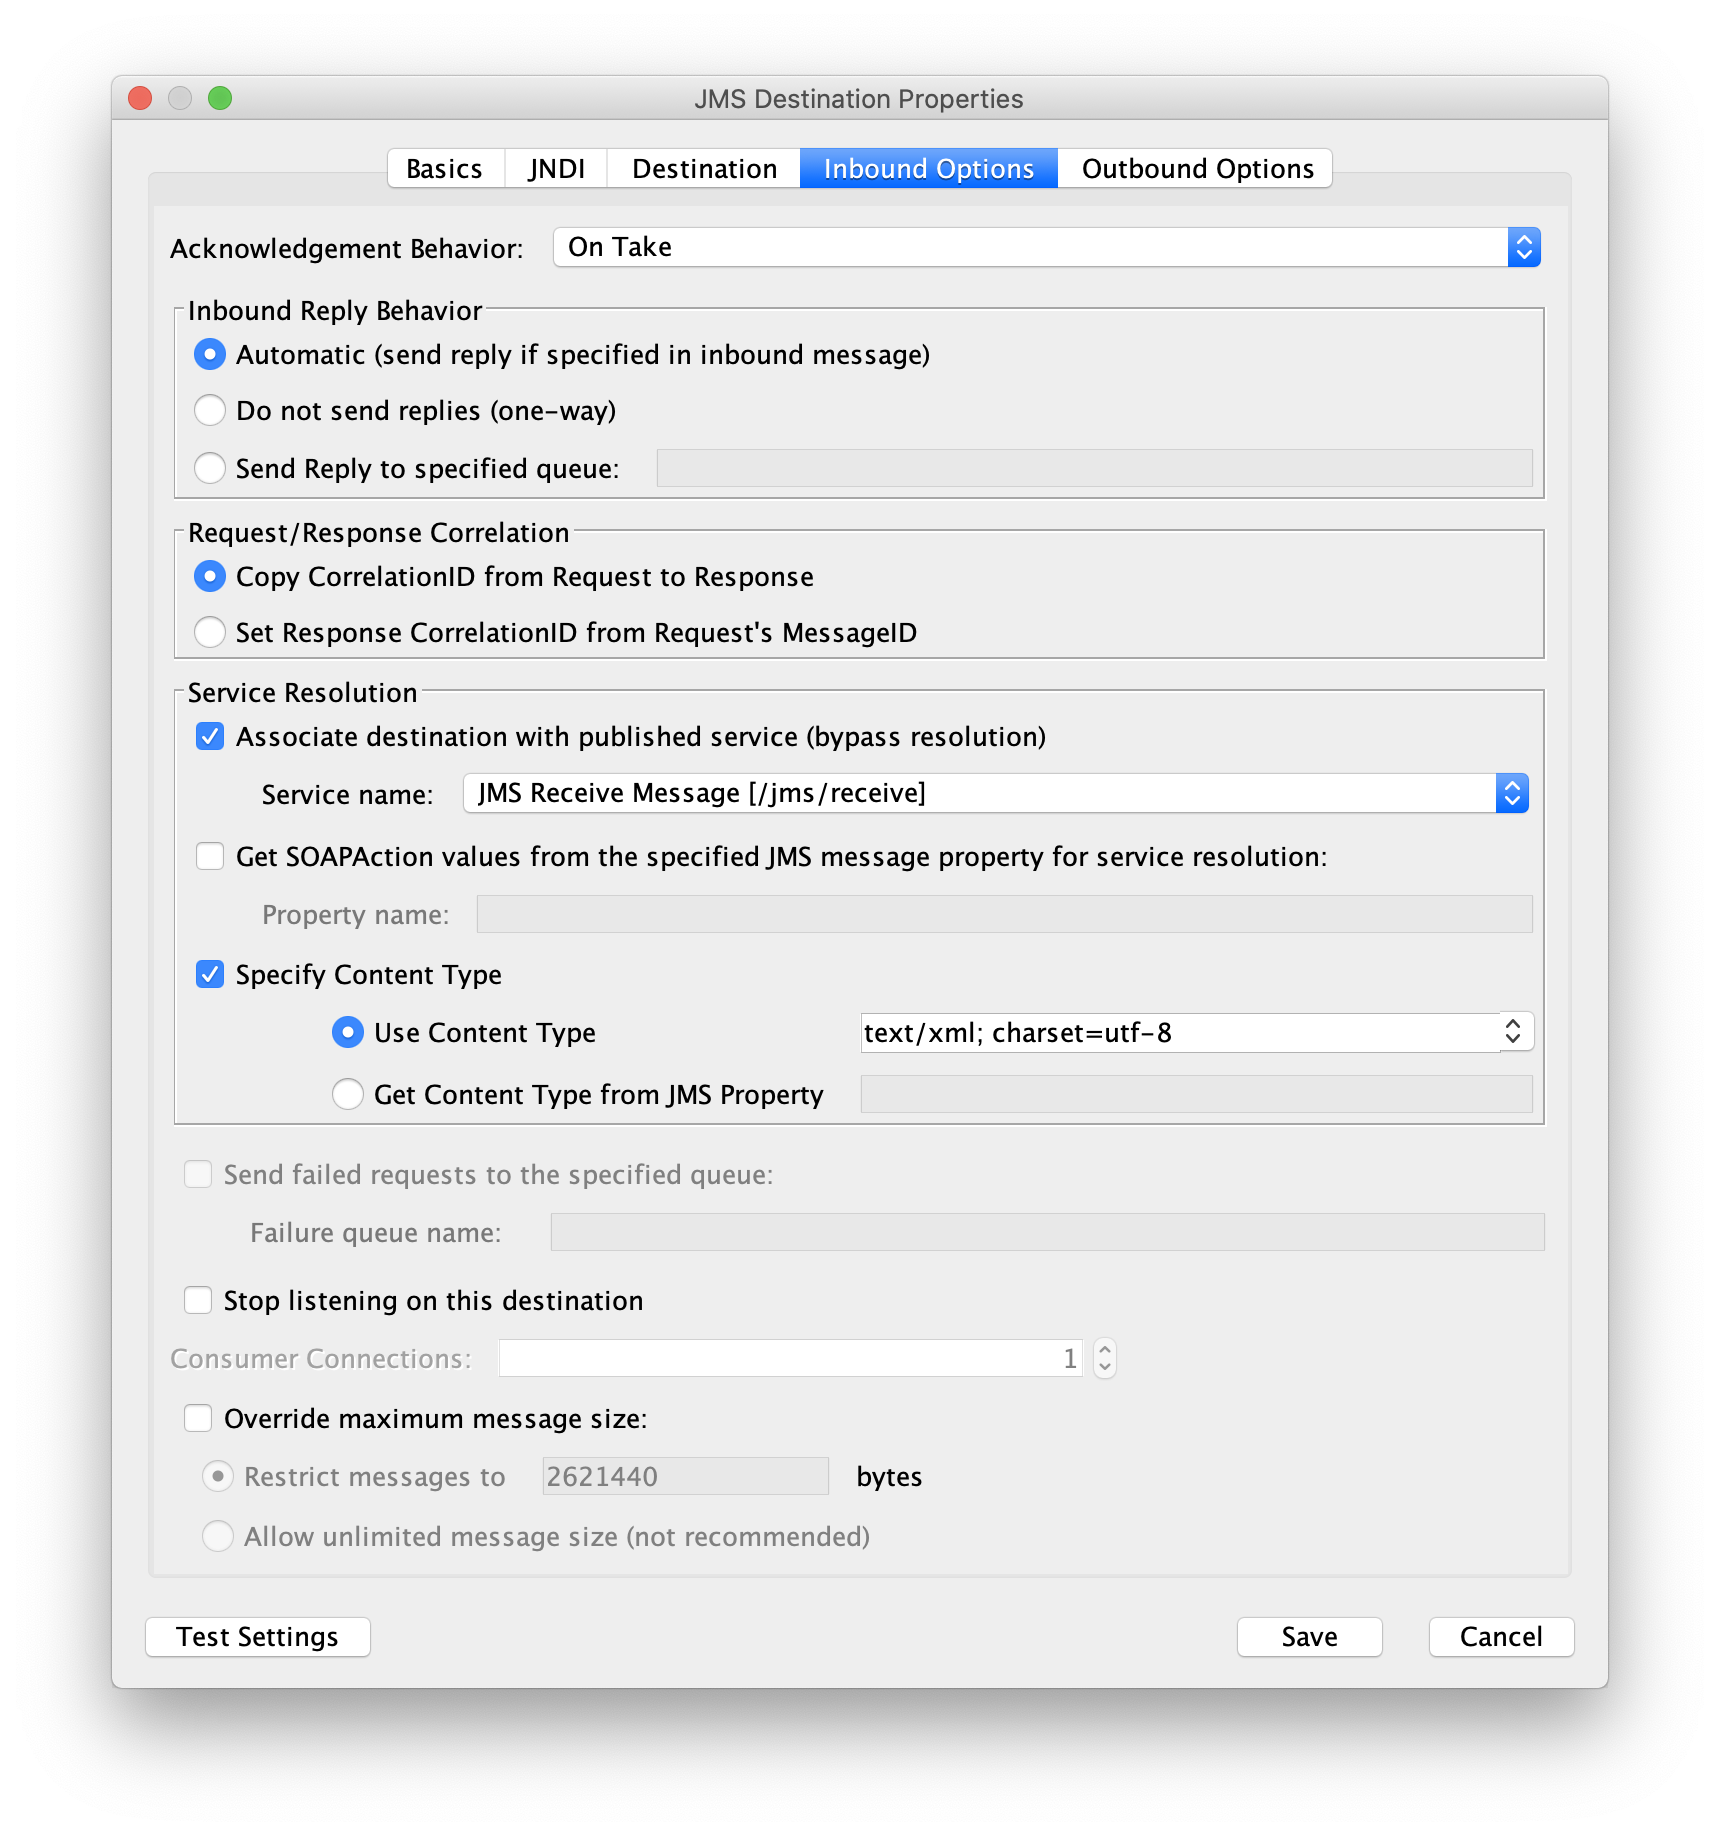
Finally, we set the Inbound Options. I recommend looking at the API Gateway documentation for more details, but the only setting relevant to this example is to change the Service Resolution settings to:
Associate destination with published service: Checked
Service Name: Receive JMS [/jms/receive]
This causes any message that is posted to the registered destination to be funneled to the Receive JMS Web API we created in Step 4.
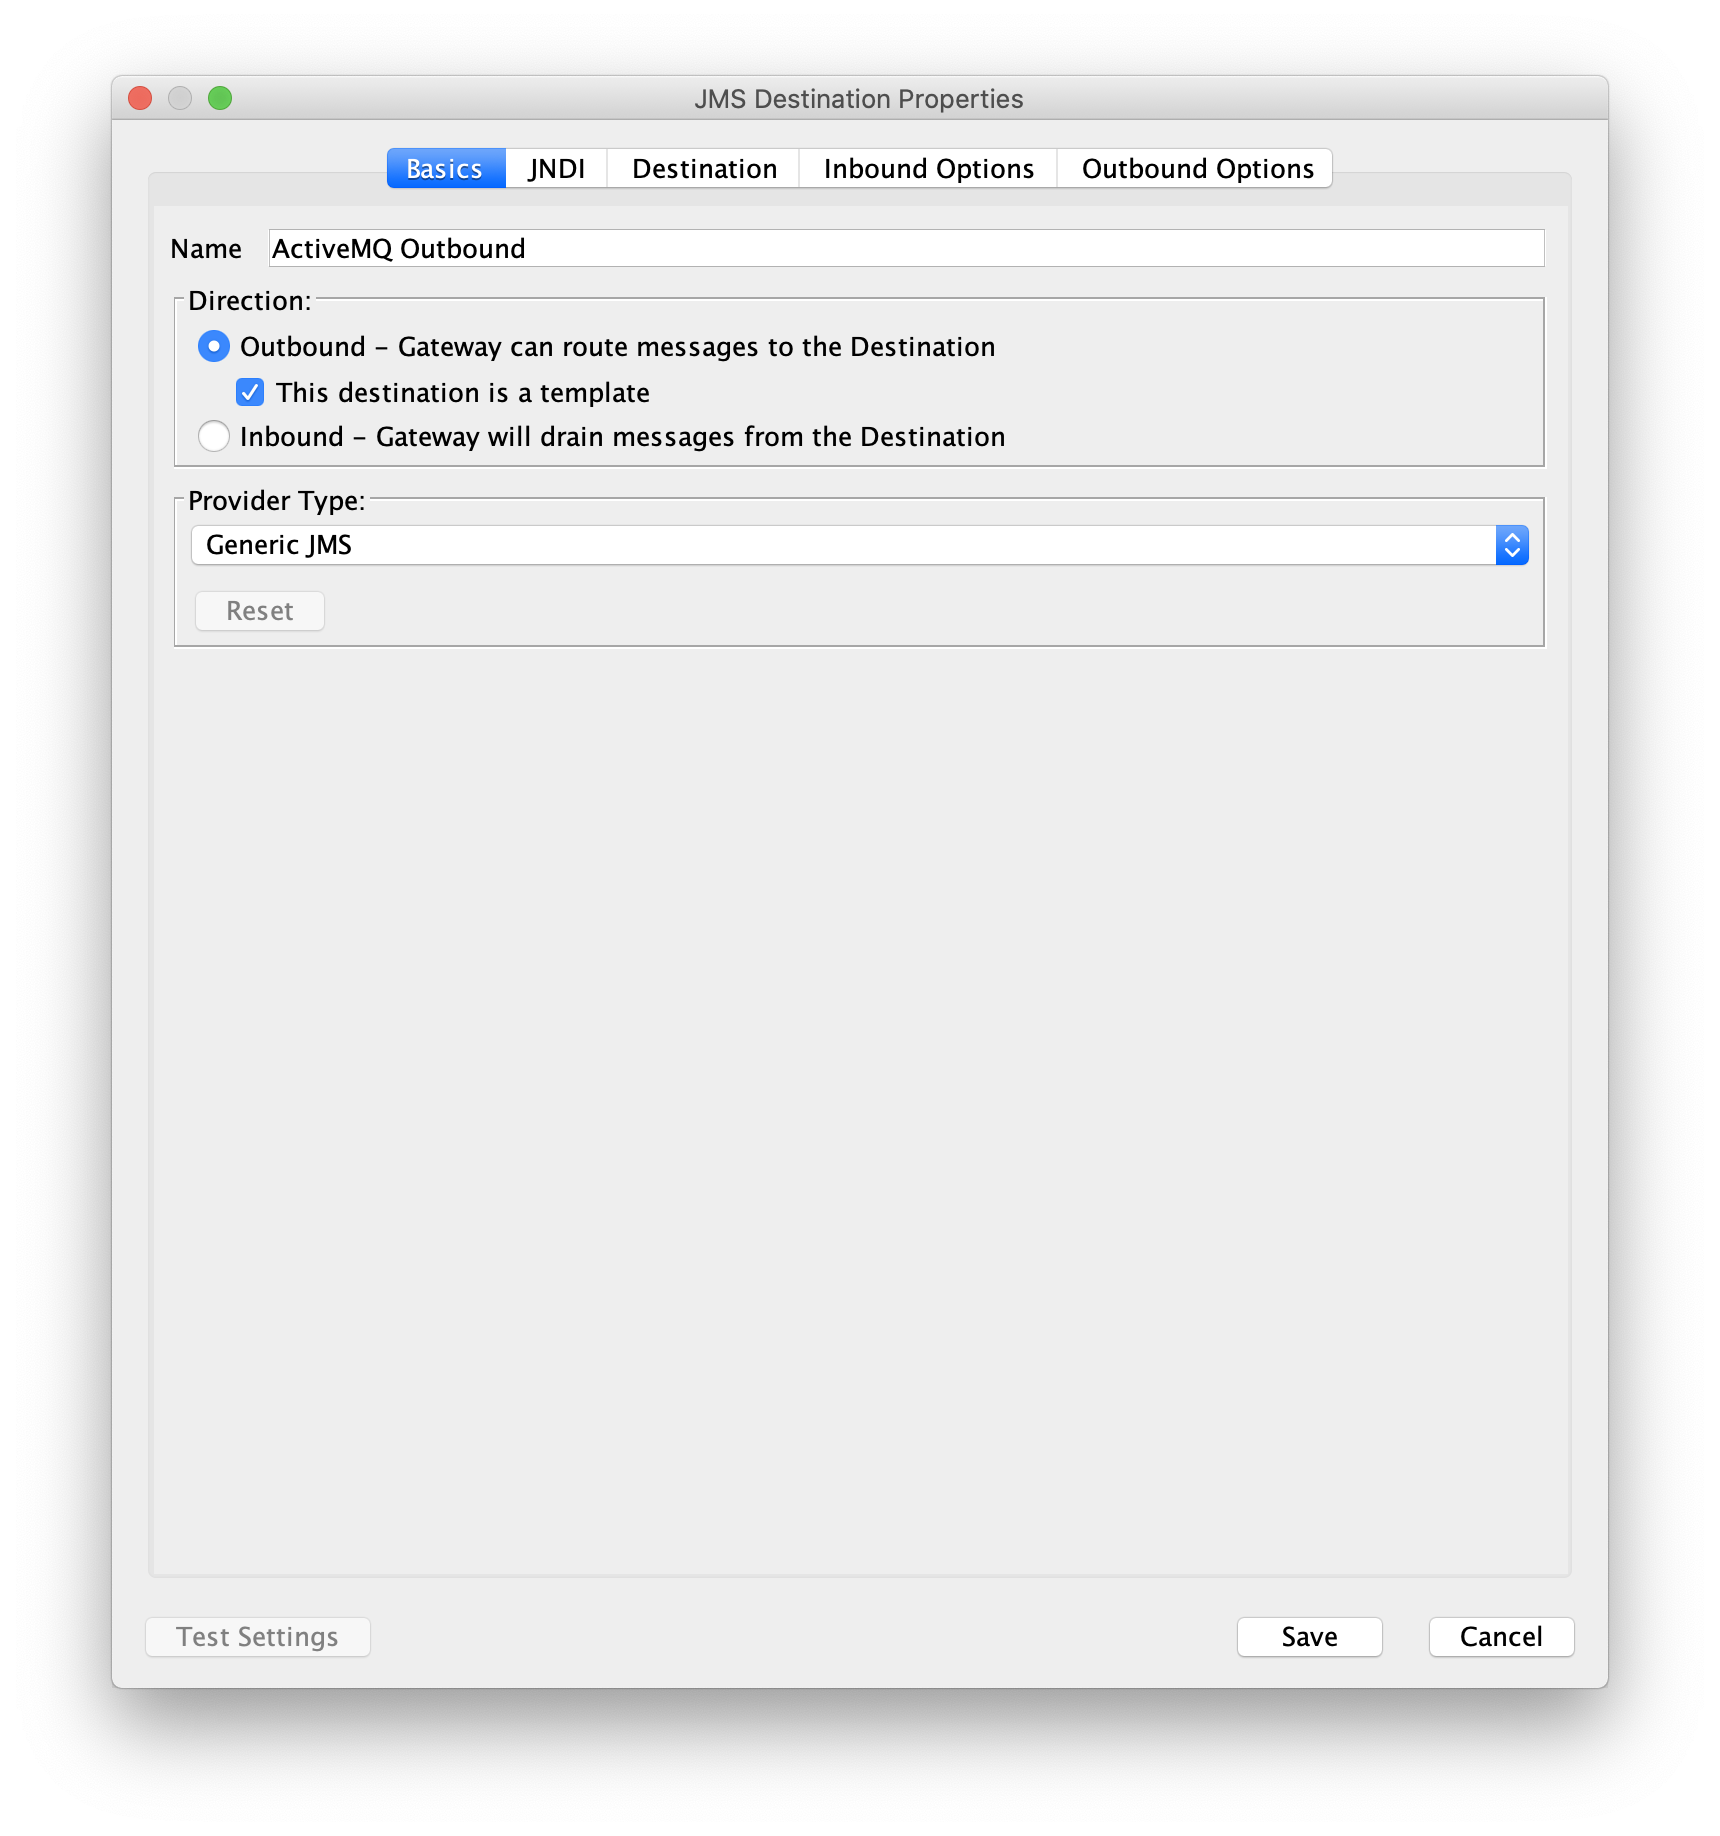
Step 6: Create an Outbound JMS Destination
Re-open the Manage JMS Destinations dialog by selecting Tasks —> Transports —> Manage JMS Destinations. Select the JMS Destination created in Step 5 and click Clone.
In the Basics tab, change the settings to:
Direction: Outbound
This destination is a template: Selected
Since this is a template, we will be able to dynamically specify the destination in a gateway policy.
The Additional Properties settings on the JNDI tab need to be modified to list all possible destinations the API Gateway may want to use in policy. This is because the actual JNDI "search" for a destination requires an exact match for the name, with no wildcards allowed. For this example, we will set the additional properties to configure three possible JMS topics we can publish to:
Name: topic.MyCategory.MySubcategory.MyName
Value: MyCategory.MySubcategory.MyName
Name: topic.MyTopic
Value: MyTopic
Name: topic.SomeOtherCategory
Value: SomeOtherCategory
In the Destination tab, use the existing settings but clear the Destination Name field so that clients can specify the name in policy.

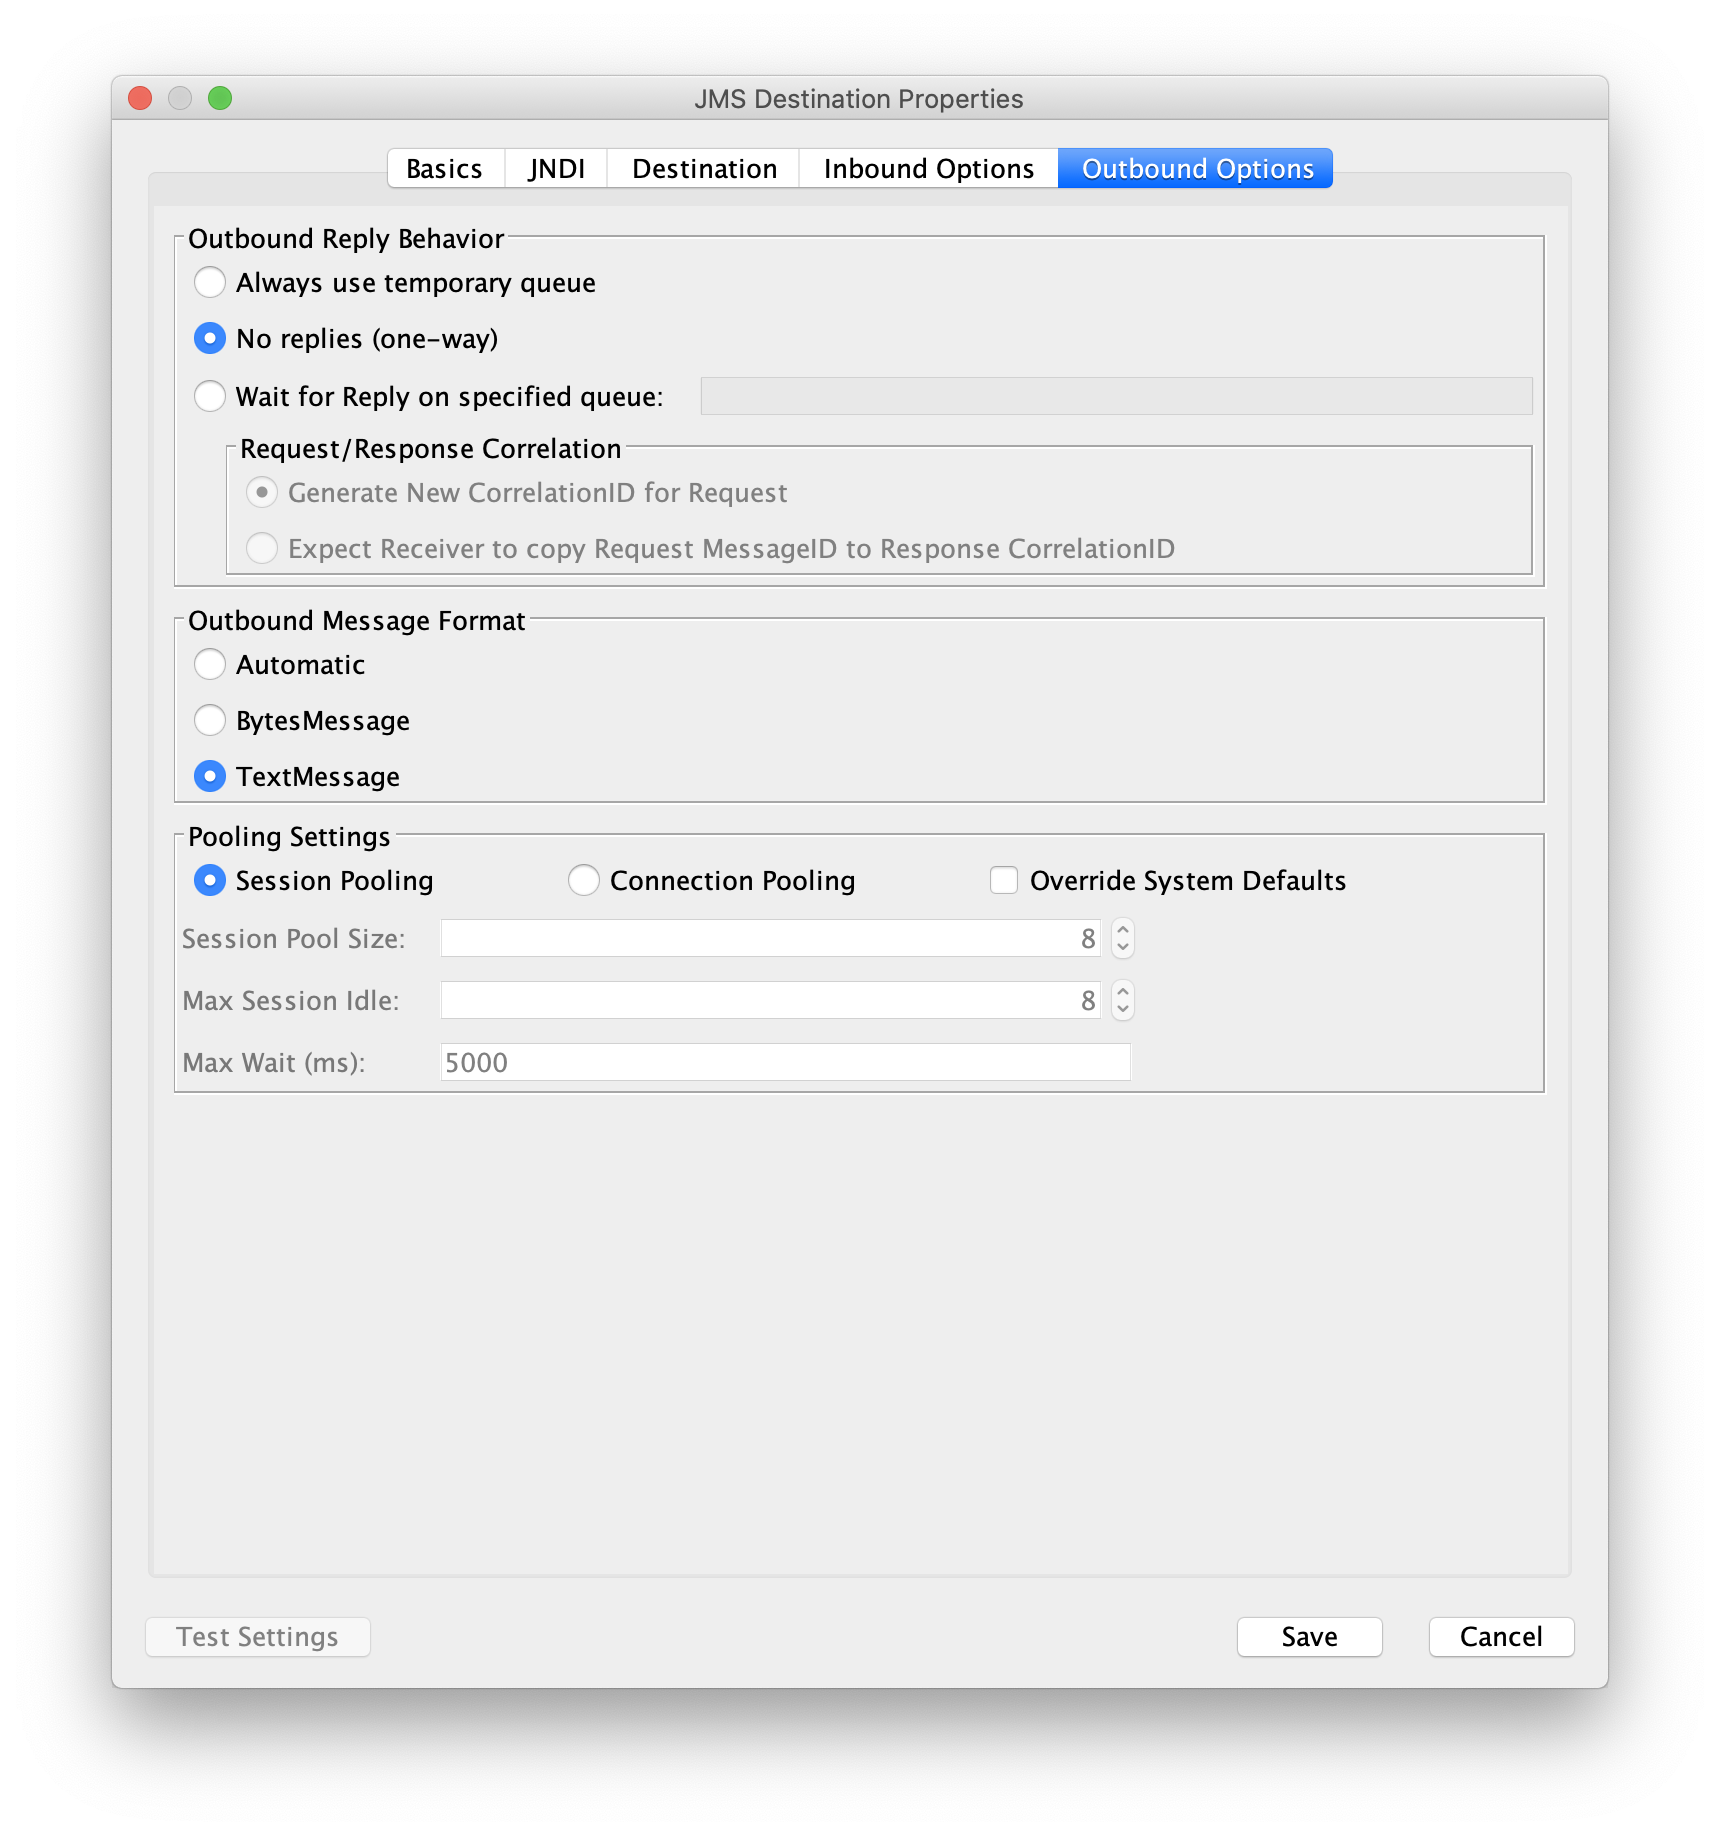
Finally, for the Outbound Options, you can use the default settings. For performance testing, I turned the Outbound Reply Behavior to No replies (one-way).
Step 7: Create a Web API Policy to Publish Messages
In Policy Manager, create another Web API with the following settings:
Service Name: JMS Publish Message
Target URL:
Gateway URL:
In the policy editor, we will create a policy that allows us to post a simple XML message to a JMS destination whose name is provided as the HTTP parameter destination.
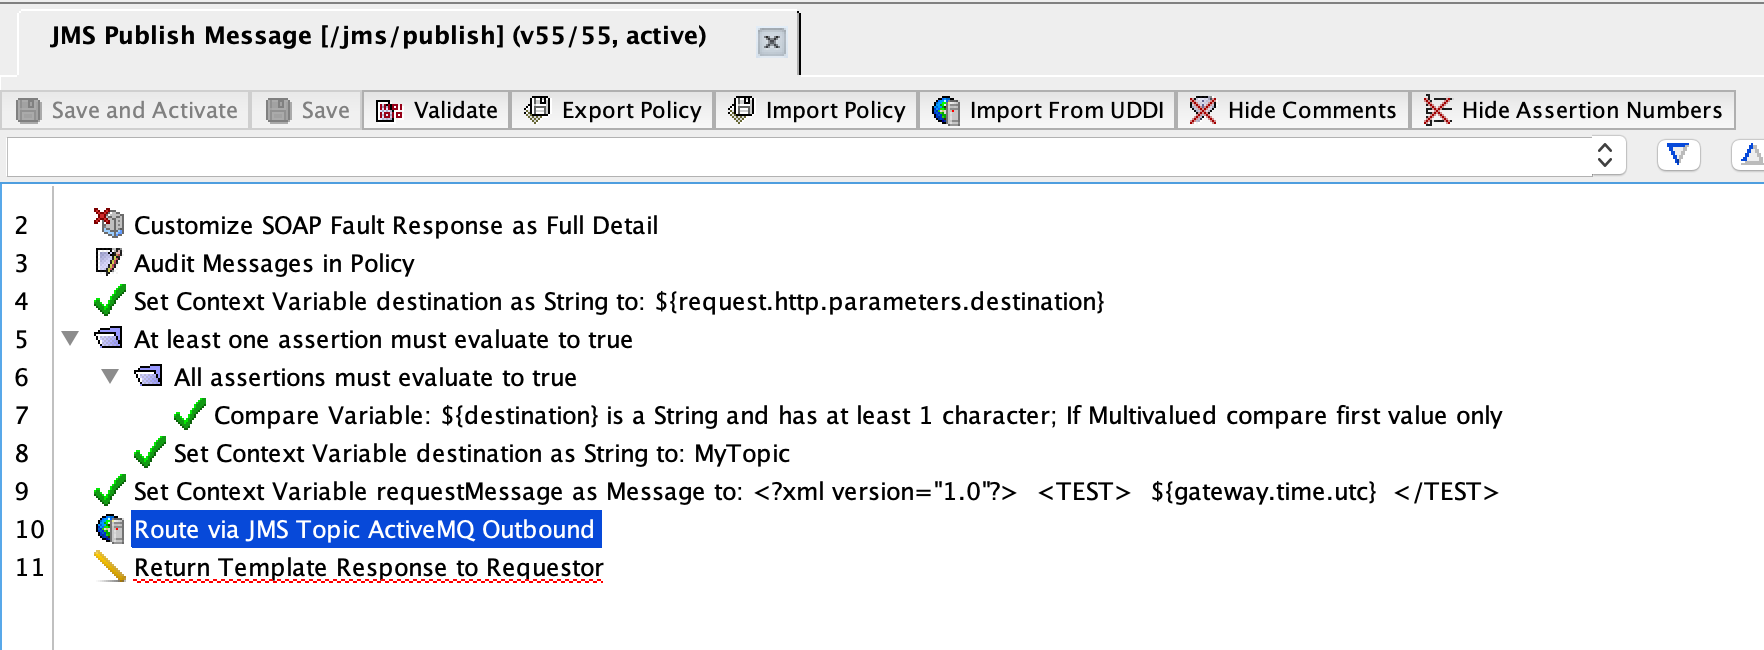
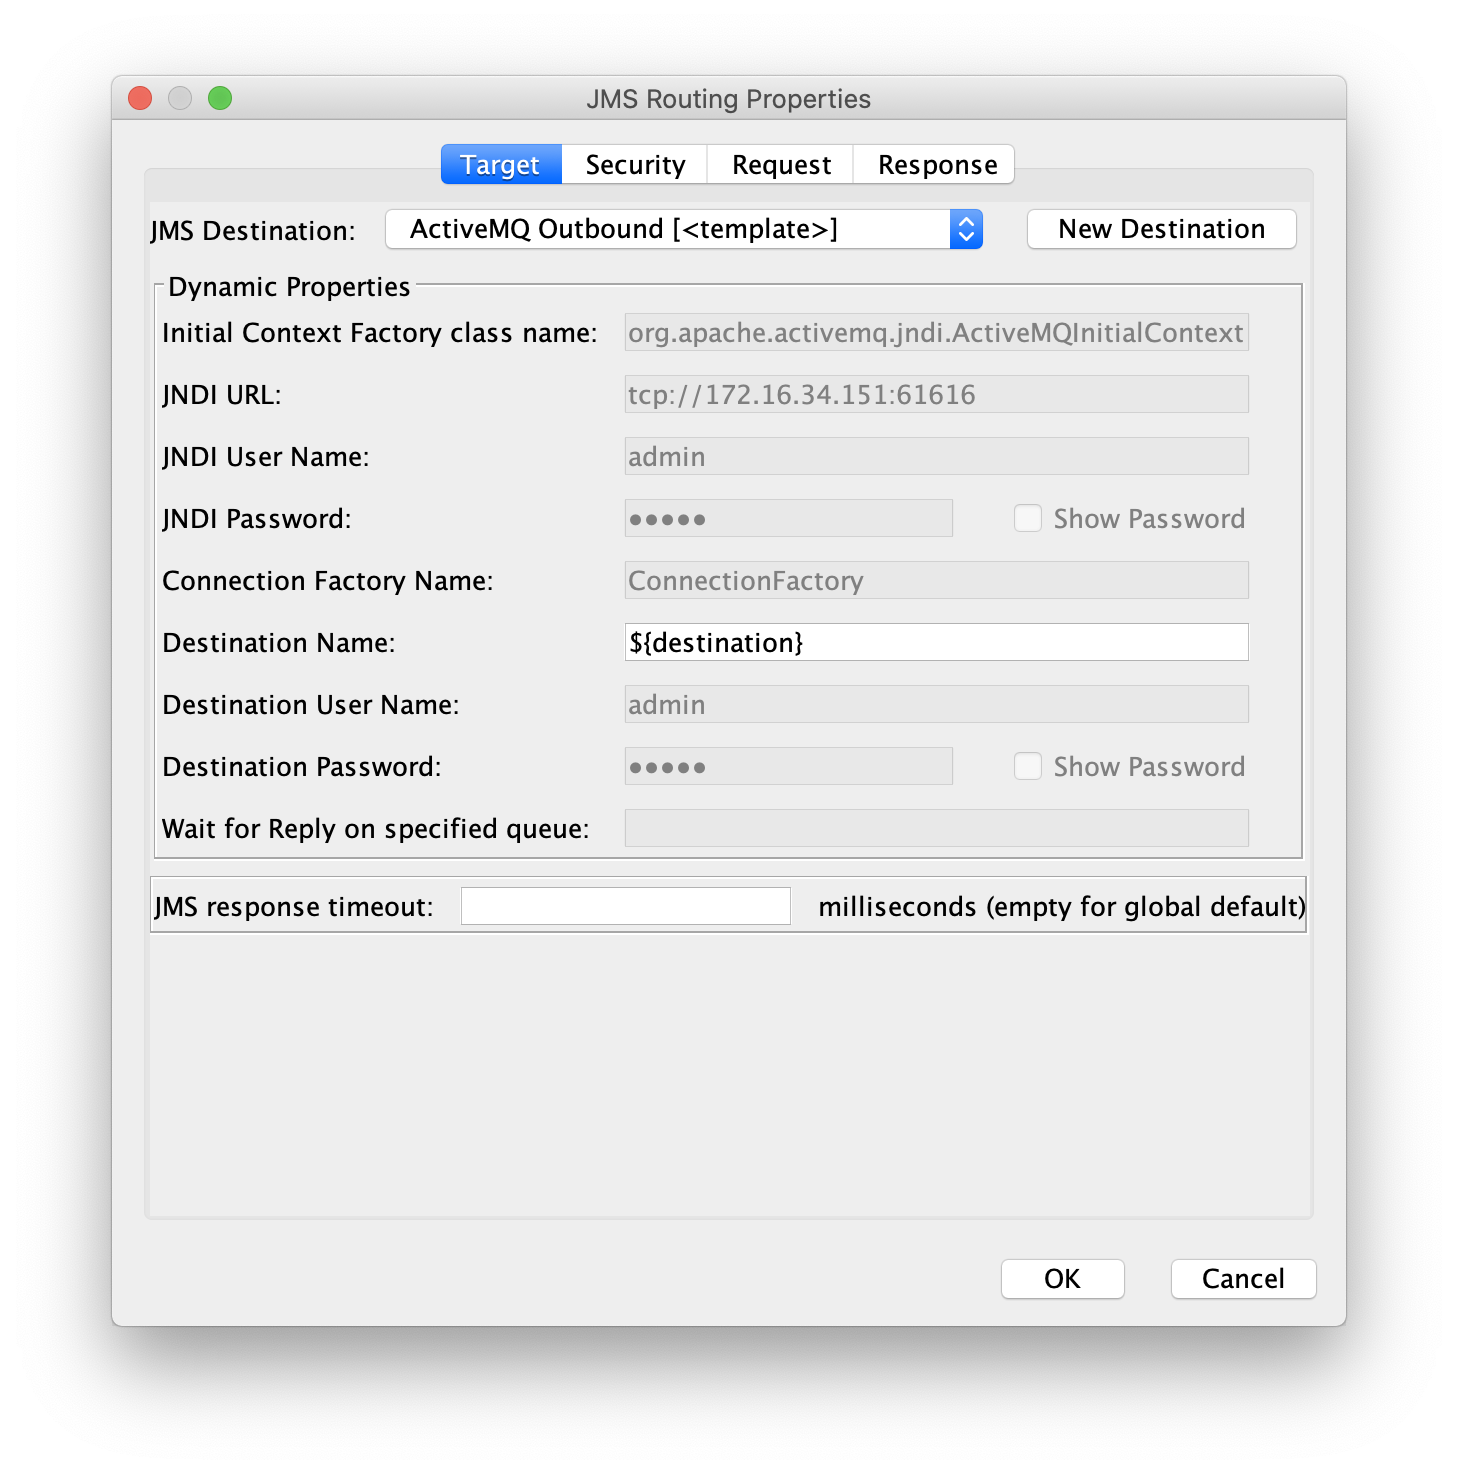
The Route via JMS Assertion should be configured so that the Destination Name is set to the variable ${destination}
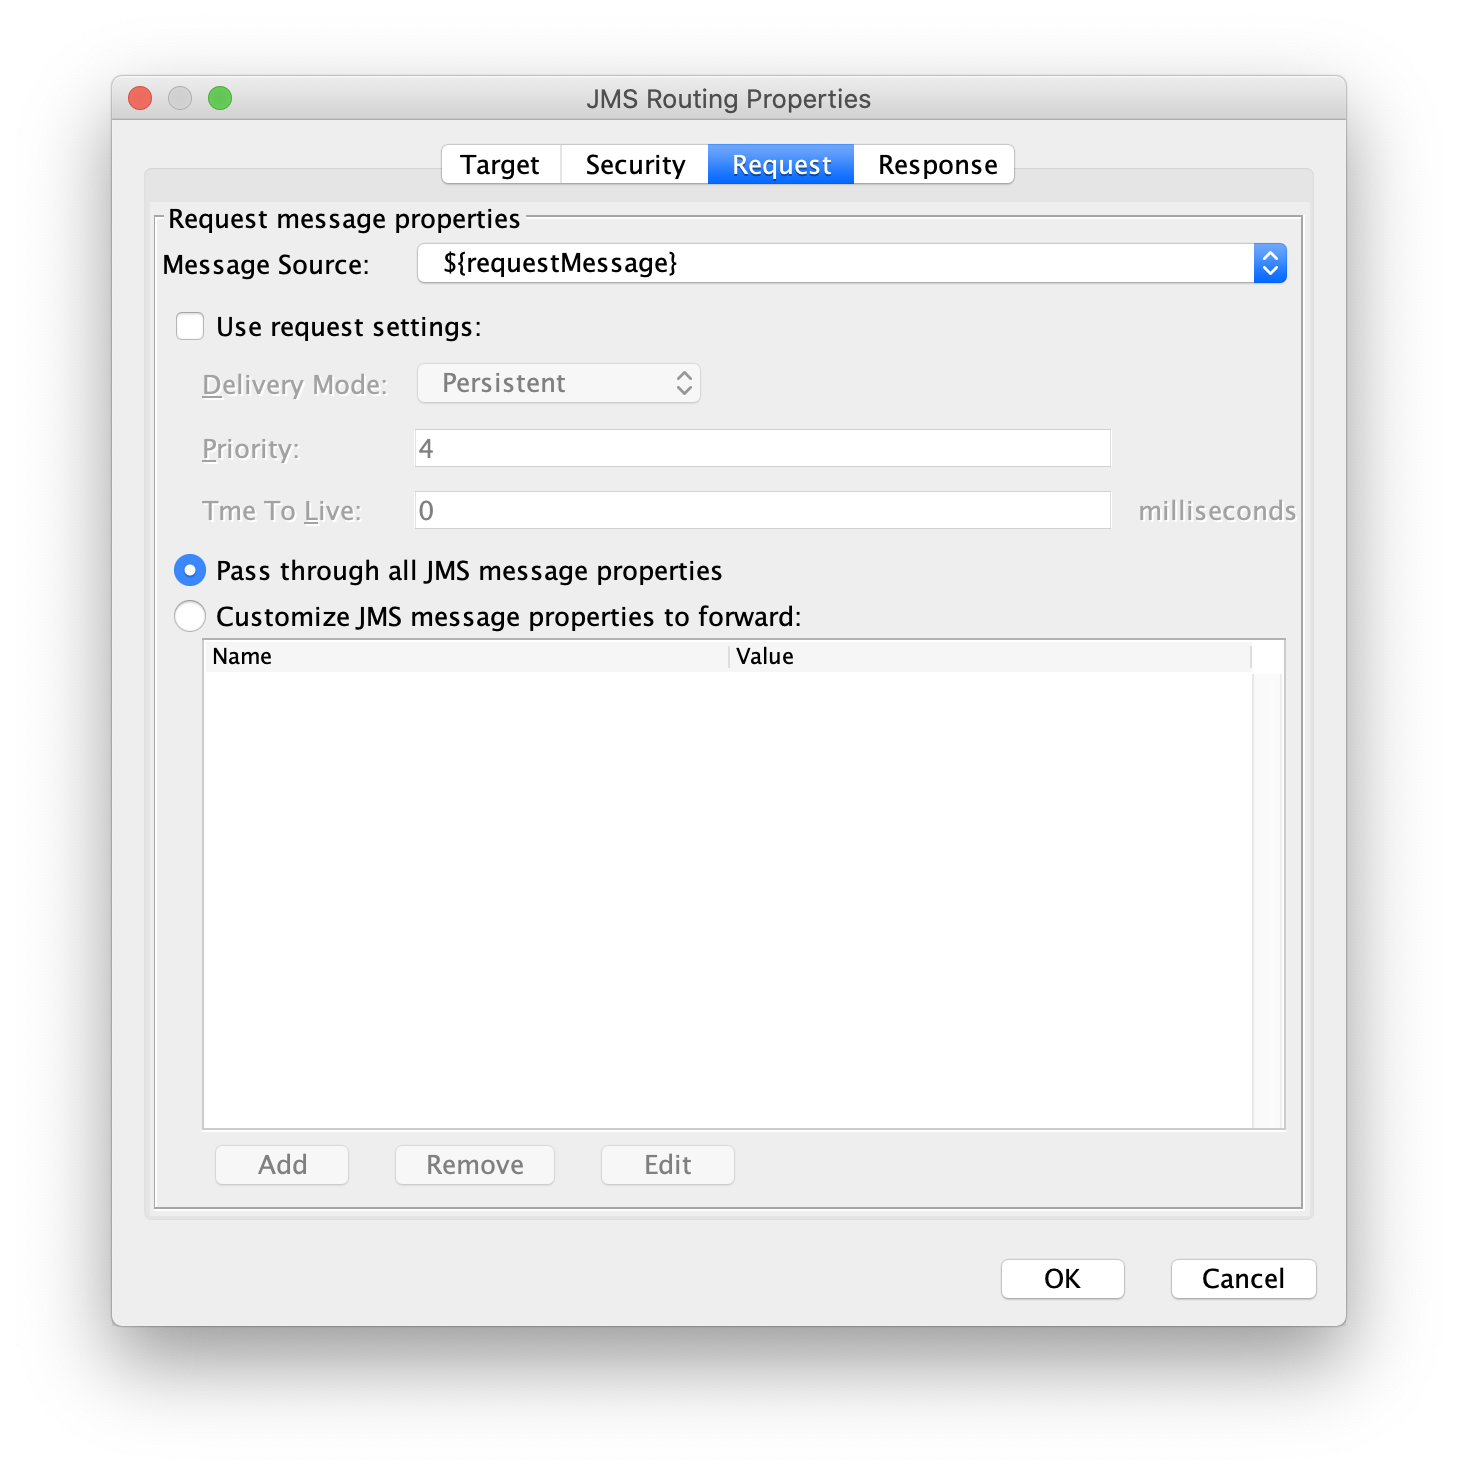
We will also need to set the Request settings so that the published message will be populated by the ${requestMessage} variable.
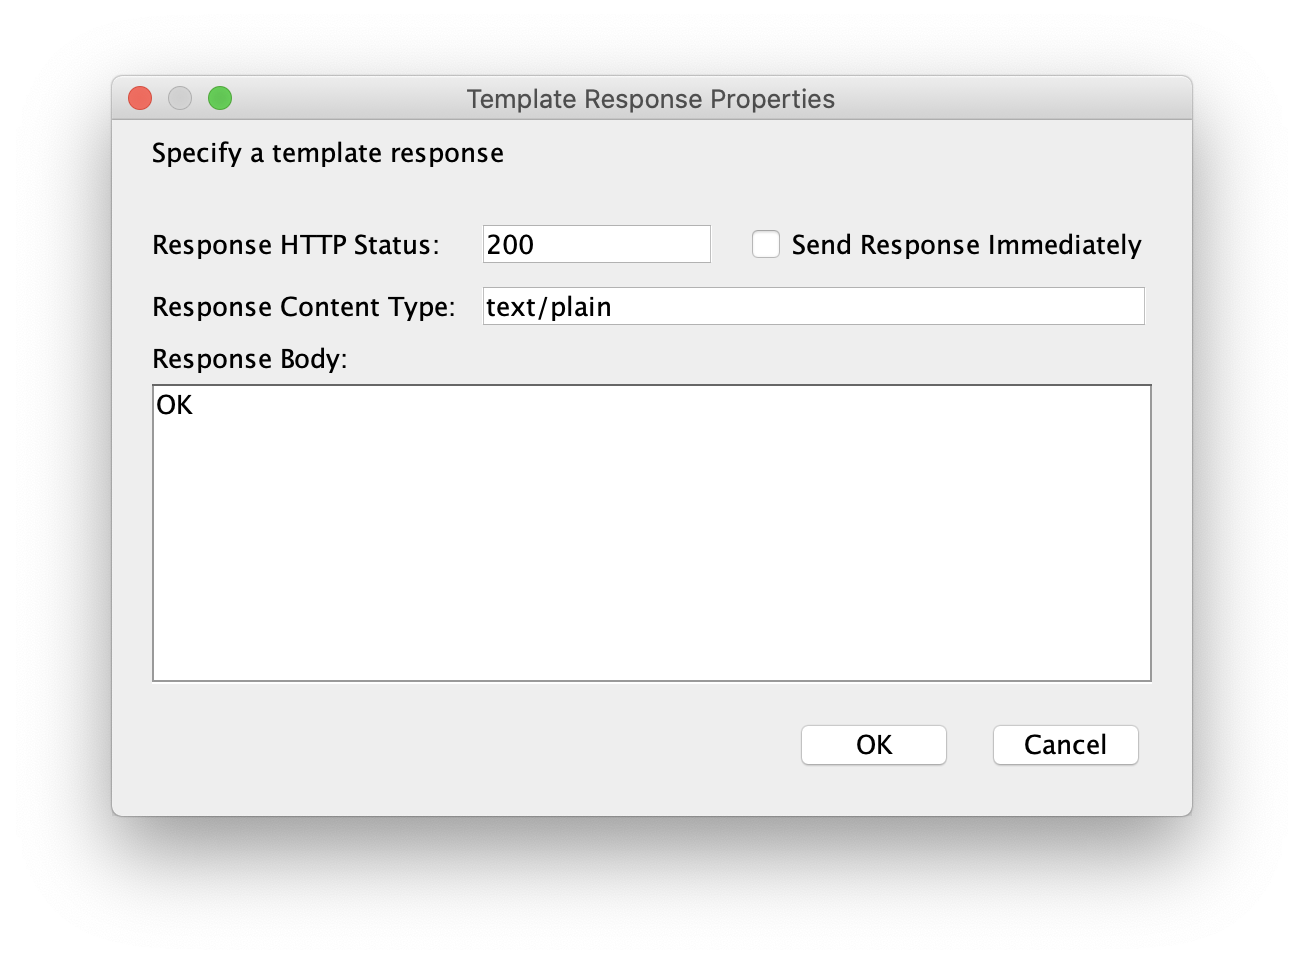
Finally, since the browser will be used to kick off the JMS Publish Message policy, we should send back a reasonable response. Since this is a simple test, we'll respond with an HTTP 200 and a plain text message that says "OK"
Step 8: Test
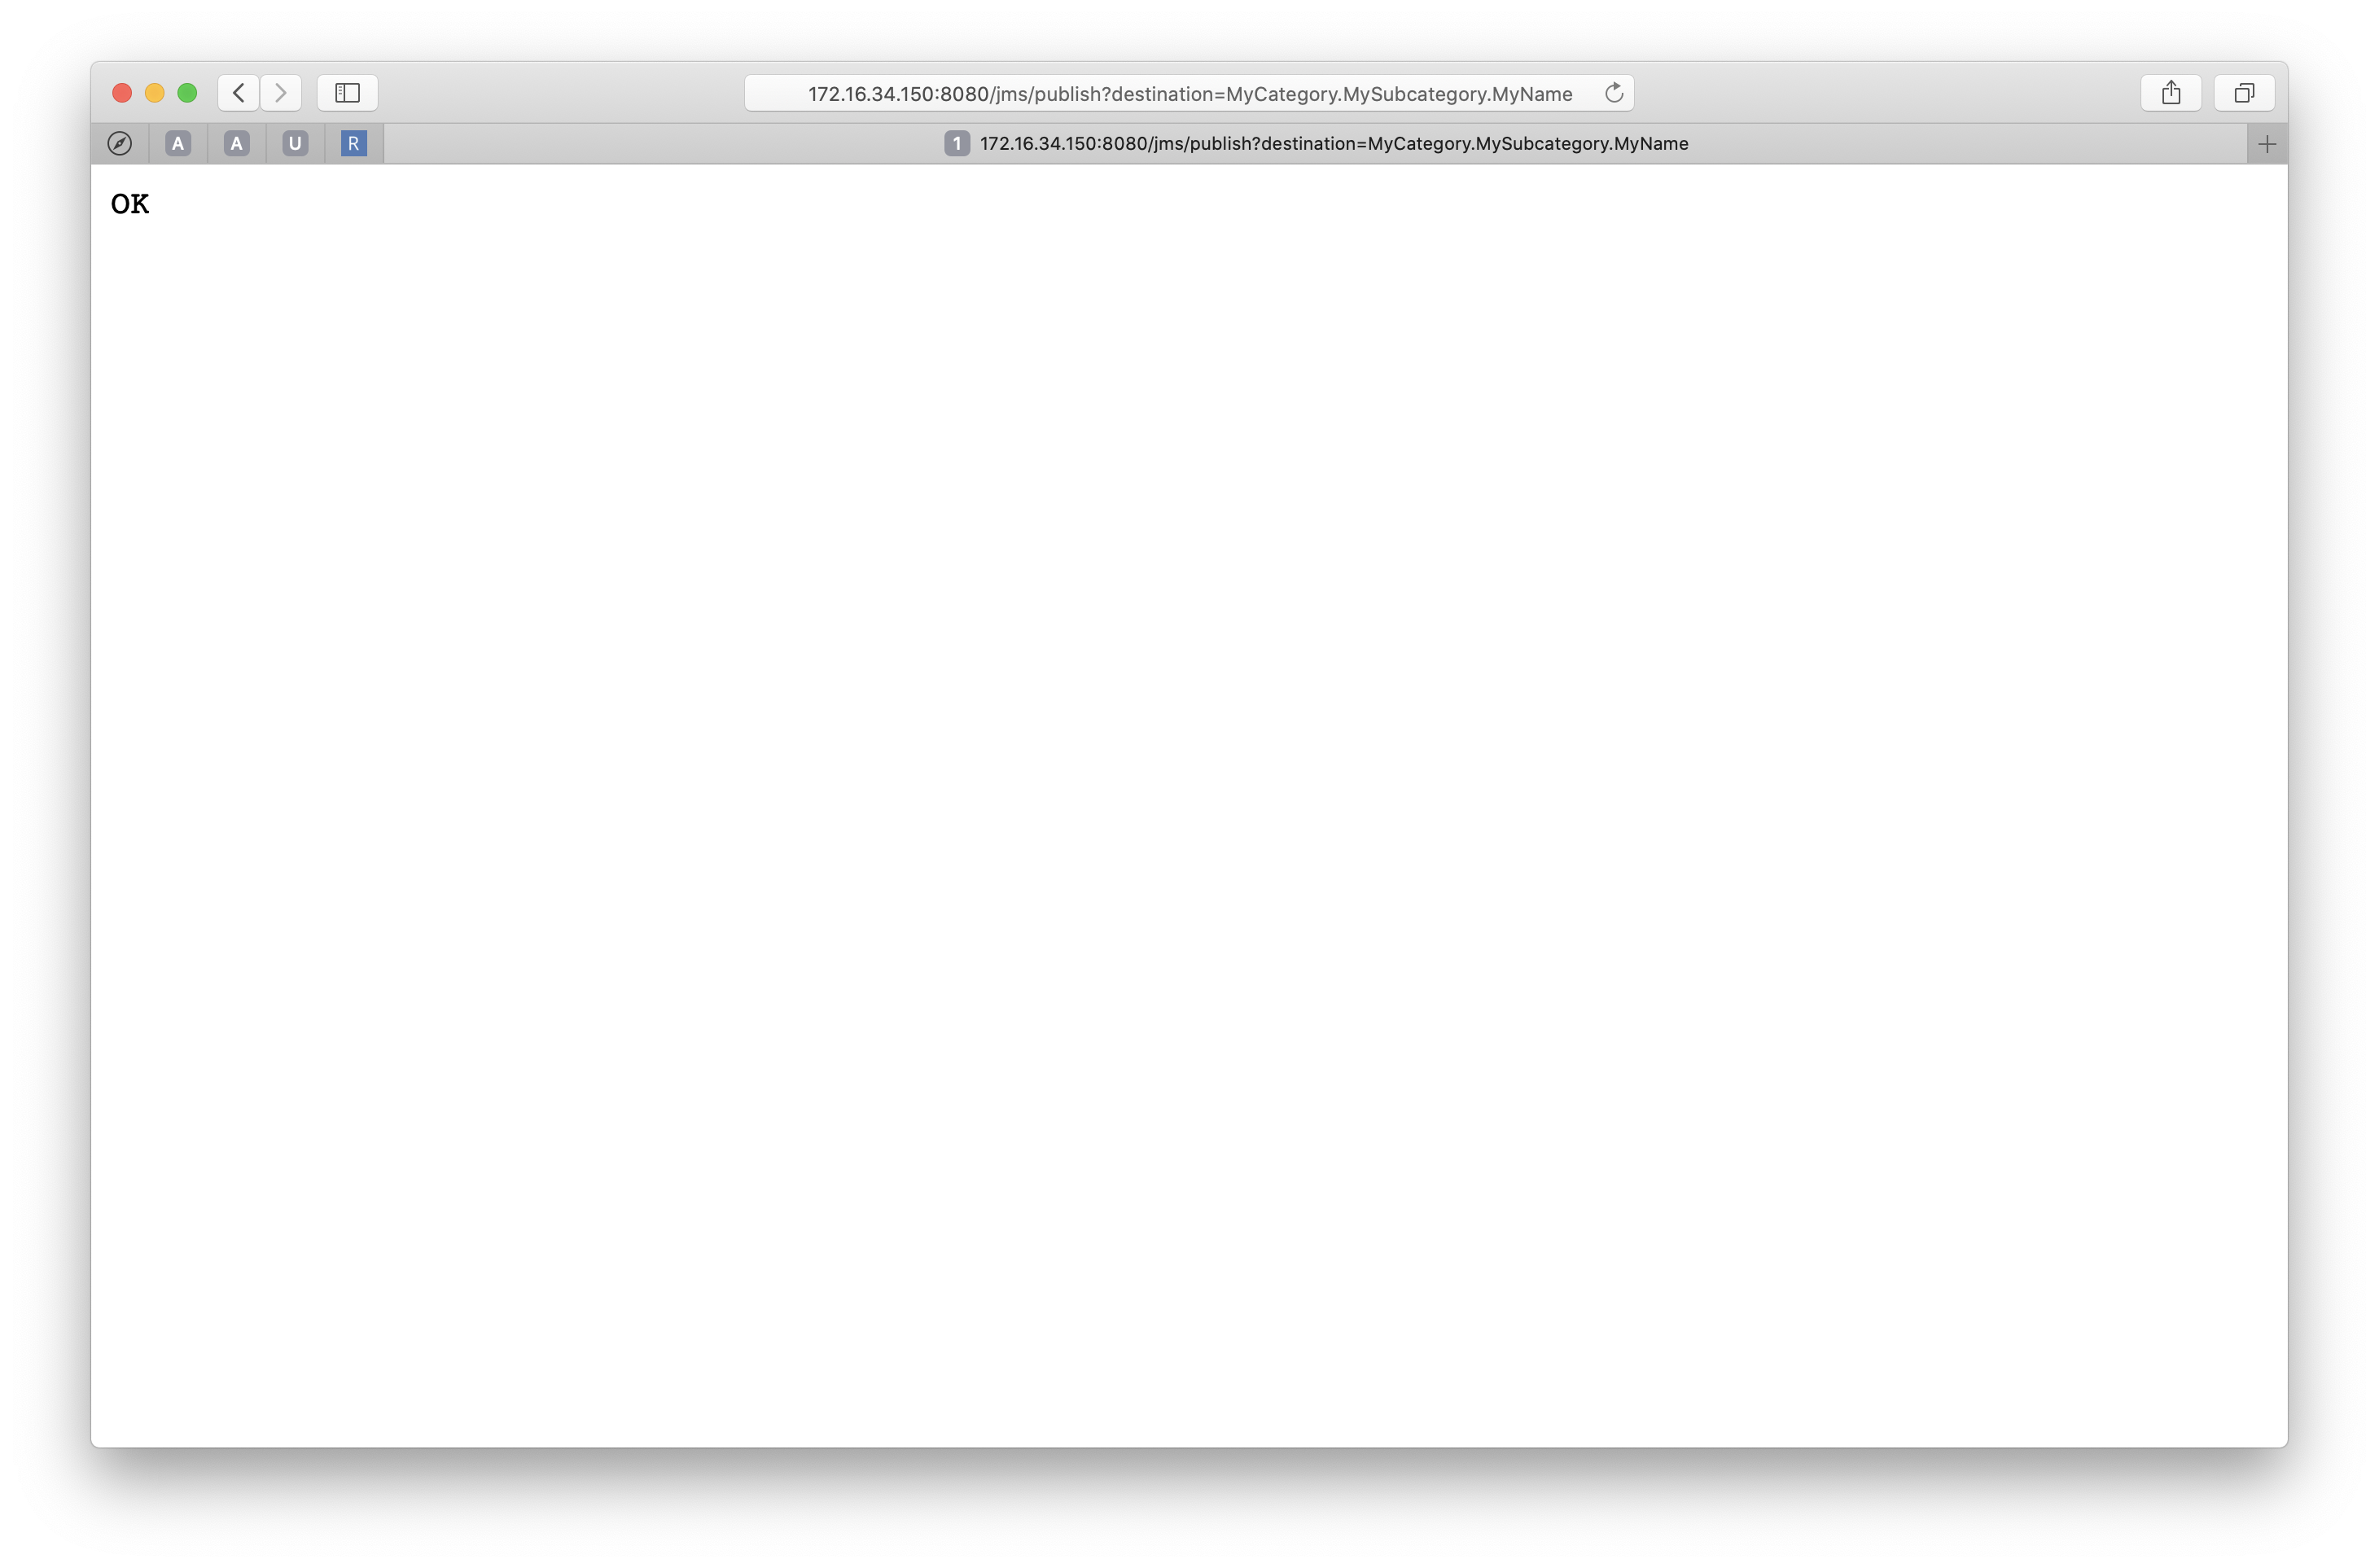
You can use the browser to issue requests and test the JMS Publish Message policy at the URL http://your-gateway-hostname:8080/jms/publish
By default, it will publish to the JMS Destination named MyTopic. To override this behavior, add a destination parameter to the URL. Here are some valid examples based on the JNDI names specified back in Step 4:
http://your-gateway-hostname:8080/jms/publish?destination=MyCategory.MySubcategory.MyName
http://your-gateway-hostname:8080/jms/publish?destination=MyTopic
http://your-gateway-hostname:8080/jms/publish?destination=SomeOtherCategory
Only messages sent using the first example (to the destination MyCategory.MySubcategory.MyName) will cause the JMS Receive Message policy to be invoked, as it is subscribed to any message published to a topic whose name starts with MyCategory since it is subscribing to all destinations that meet the JMS wildcard pattern MyCategory.>
At this point you have now successfully configured the Broadcom Layer 7 API Gateway to use ActiveMQ 5 via the Openwire protocol. Congratulations!